Quantcast
Channel: Clint Boessen's Blog
Viewing all 343 articles
Browse latest View live

Azure AD Application Proxy Overview, Deployment Process and Limitations

$
0
0
One of my customers came to me enquiring about publishing some on-premises applications through the cloud using Azure AD Application Proxy.  This feature of Azure is relatively new and there is currently limited documentation about this available online.  I put some time aside to learn the technology and get a deep understanding on how the technology works.

In this article I will be running through a high level overview of how Azure AD Application Proxy works and then go through a step by step for a basic deployment of Azure AD Application Proxy to publish Outlook Web App.

Azure AD Application Proxy Overview

Azure AD Application Proxy is essentially a reverse proxy solution which is hosted completely in the Microsoft Azure cloud that allows companies to provide secure remote access to on-premises web based applications.  Traditionally companies needed to setup client side VPN connections or use demilitarized zones to provide secure remote access to on-premises web applications - especially for some web applications which may not be built secure for direct publishing to the Internet.  There are numerous security benefits for using Azure AD Application Proxy such as leveraging rich authorization controls and security analytics in Azure, two factor authentication, DDOS protection, no inbound connections to your internal network and much more.  I'm not going to go into all the security benefits of Azure AD Application Proxy in this article but you can do some further reading on the Microsoft website about this here:


It is important to mention, Azure AD Application Proxy is regional based.  Microsoft will automatically select the Azure Datacentre to host this service for you based on the country you specify when signing up to Microsoft Azure.  When you enable Application Proxy, the Application Proxy service instances for your tenant are chosen or created in the same region as your Azure AD tenant, or the closest region to it.

I have put together a high level overview of how Azure AD Application Proxy works below which I will be going through below (click to enlarge).


Without going too deep, there are essentially four components that make Azure AD Application Proxy work:
  • Azure AD Application Proxy Apps
  • Connectors
  • Connector Groups
  • Backend Applications
I will cover each of these below.


Azure AD Application Proxy Apps

Azure AD Application Proxy Apps sit in Microsoft Azure along side all your Software as a Service (SaaS) that you have published through Azure AD.  The primary difference between Application Proxy applications and standard Web Based Cloud applications, is Proxy Apps will redirect you to the server on-premises.

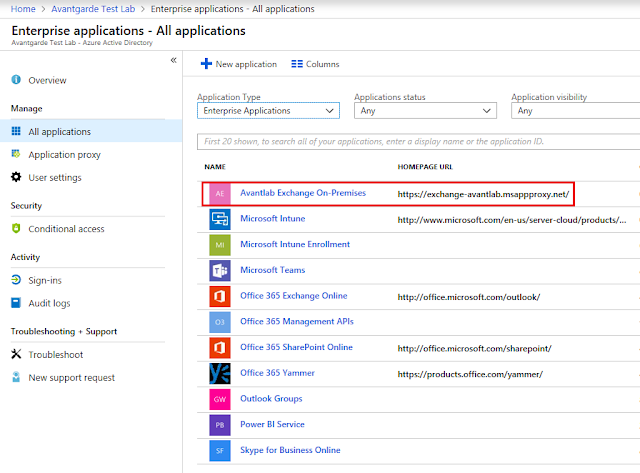
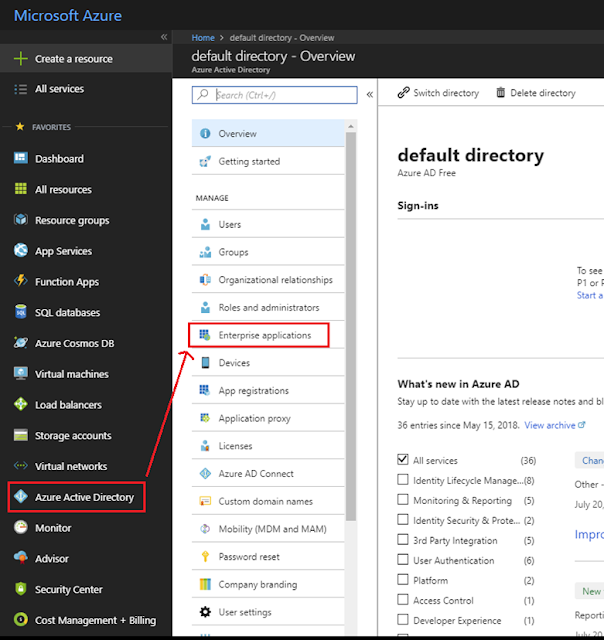
In Microsoft Azure, you can see the Application Proxy Applications with all your other Enterprise Applications.  Simply login to https://portal.azure.com and select Azure Active Directory --> Enterprise Applications.


When we open the Enterprise Applications, we can see an Azure AD Application Proxy application I created which sits along with all my other SaaS applications that I have associated with this Azure AD Tenancy.


Users can access the application directly by going directly to the Application Home Page URL or by logging into their application portal where all their SaaS applications are published.  This portal is under:

http://myapps.microsoft.com

As you see my test user user1@avantlab.com.au has only been presented with a few applications:


Connectors

Connectors facilitate traffic flow from the Azure AD cloud to your on-premises applications.  They are services which are installed on servers on your internal network running Server 2012 R2 or Server 2016.

Connectors are stateless and hold no configuration data on the machine apart from settings needed to connect to the Azure AD cloud service and its authentication certificate required for authenticating itself against the cloud.  They automatically update their configuration information every few minutes from the cloud.

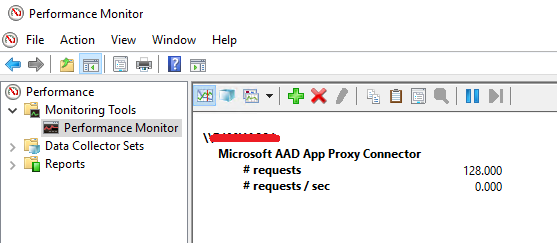
When installed on an on-premises server, the connector will simply show as services in the Windows MMC console.


All connectors do not require any inbound firewall or Network Address Translation (NAT) rules publishing the connectors to the Internet.  They only initiate outbound connections to Azure creating a stateless connection to the cloud which is used to receive inbound application requests.  You can move the member servers running these connectors to different datacentres or public IP addresses, and because they are creating outbound connections it will not disrupt the on-premises web applications they publish.

As the Connectors do not require any inbound ports open from the Internet, they do not need to be located within a Demilitarized Zone and can go directly on servers on your internal network.  It is recommended deploying the connectors as close to your servers as possible to minimise latency.

Connectors can service multiple Azure AD Proxy Applications on your internal network and can be made fully redundant.

For production environments, it is always recommended to have multiple (at least two) Application Proxy Connectors on an on-premises environment to provide high availability to published on-premises applications.

Microsoft Azure automatically maintains the on-premises connectors not only the configuration, but updates.  Provided the "Microsoft AAD Application Proxy Connector Updater" service is running, your connectors will be automatically updated and patched.  If you have multiple connectors on your environment associated with a connector group, updates will only target one connector at a time in the group to prevent downtime to your environment.  We will talk about connector groups next.

Lastly it is important to mention, Connectors can run on member servers that are not domain joined however if you want Single Sign-On (SSO) working for applications that use Integrated Windows Authentication, they need to be setup on domain joined servers.  I will be showing you how to deploy Windows Integrated Authentication for an Azure AAD Application Proxy connector later in this post.

Connector Groups

All Connectors are associated with a Connector Group in Azure.  If you do not first define a Connector Group, all connectors you create will get assigned to a "Default" Connector Group.

A few key things to take away from Connector Groups:
  • Every AAD Proxy App you create must be assigned to one Connector Group (one to one relationship)
  • One Connector Group can contain Many Connectors (one to many relationship)
  • One Connector Group can service many applications (one to many relationship).
Connector Groups ensure on-premises application requests are load balanced across all on-premises Connectors in the group.  No configuration is done to setup load balancing between the connectors, this is done all automatically after the connectors are installed.

For most companies, only one Connector Group will be required with a few connectors as this will look after all your internal applications.  But why would you want to create multiple Connector Groups?  There is a few reasons.
  • Multiple Datacentres
  • Network Isolation
  • IaaS Deployments
  • Multi-Forest Deployments
  • Multiple Companies in a Single Azure AD Tenant

Multiple Datacentres

If you have multiple datacentres, you will most likely want to have a separate connector group with connectors in each datacentre.  This is to ensure latency is minimised between the connector and the application to provide the best experience for the users.

Network Isolation

If you have any network isolation between applications on your internal network such as Access Control Lists or Network Segmentation, you will want to ensure separate connector groups are created for each segment.  Remember the connectors associated with the connector group need internal connectivity to the application published.

Infrastructure as a Service Deployments

If you have any member servers in an IaaS cloud running internal web applications, you will most likely want to put connectors in the IaaS tenancy to minimise latency and a separate connector group.

Multi-Forest Deployments

If you have multiple on-premise Active Directory forests, you want a connector group for each Active Directory forest so that Kerberos Constrained Delegation works correctly for each forest.

Multiple Companies for a single Azure AD Tenancy

Some IT Departments for parent companies may run the on-premises networks for many child companies which are associated against a single Azure Tenancy.  You will want a connector group for each child company as they will most likely each have their own Active Directory forest.

Backend Applications

Backend applications are the on-premises products you wish to publish to the cloud via Azure AD Application Proxy.  I displayed in my diagram Exchange or SharePoint, but you can also publish other applications from Microsoft or third party vendors - as long as the entire application is web based.

Azure AD Application proxy Access Workflow

Before I get stuck into going through the steps for configuring Azure AD Application Proxy, I want to quickly touch base on the 6 steps which occur when a user accesses an application published in Azure AD Application Proxy.  This is taken from TechNet but is important to understand.
  1. The user accesses the application through the Application Proxy service and is directed to the Azure AD sign-in page to authenticate.
  2. After a successful sign-in, a token is generated and sent to the client device.
  3. The client sends the token to the Application Proxy service, which retrieves the user principal name (UPN) and security principal name (SPN) from the token, then directs the request to the Application Proxy connector.
  4. If you have configured single sign-on, the connector performs any additional authentication required on behalf of the user.
  5. The connector sends the request to the on-premises application.
  6. The response is sent through Application Proxy service and connector to the user.


Azure AD Application Proxy Deployment How-To

I have gone through and documented the steps for publishing Exchange 2016 on-premises Outlook Web App via Azure AD Application Proxy so you get an understand what is involved in setting up this technology.  In this deployment I have a single connector which is installed on my Exchange 2016 server in a default connector group.

For a production deployment, you will want to ensure the connectors are installed on dedicated servers and that you have more then one connector server for redundancy.

In this lab deployment also is using Password Hash Synchronisation between the on-premises environment and Azure AD.  If your company does not want to store your user password hashes in Azure AD, you can also use Passthrough Authentication with the Azure AD Connect tool.

Before we start configuring the Azure Application Proxy, you need to have Azure AD Connect setup and synchronising.  You will most likely already have this in place, but if you have never done this before, I have documented the steps.  Its very straight forward!

Setting up Azure AD Connect for Password Hash Synchronisation

First of all download the Azure AD Connect tool from:

https://www.microsoft.com/en-us/download/details.aspx?id=47594

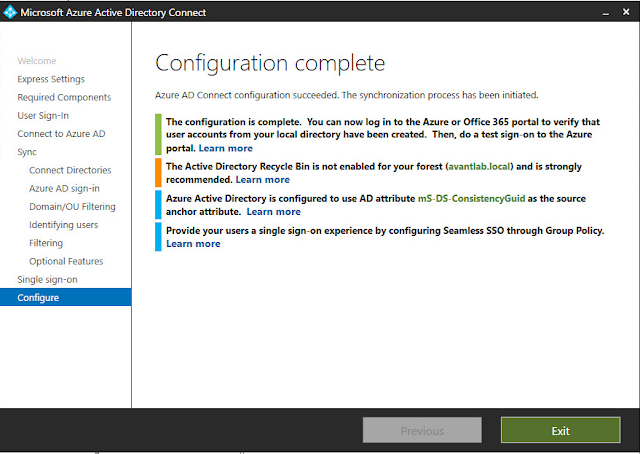
Once the tool is downloaded, run it and accept Microsoft's End User Licensing Agreement (EULA).


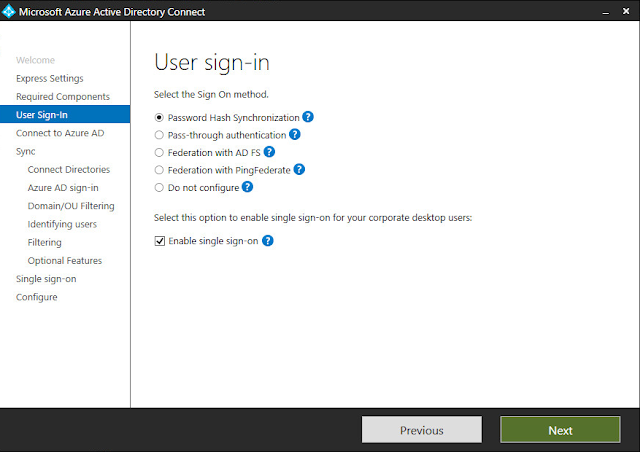
When you get to this screen you will be asked if you want to use Password Hash Synchronisation or Passthrough Authentication.  If your company does not want user passwords in Azure AD, you need to use Passthrough authentication.  For this lab I'm using Password Hash Synchronisation.

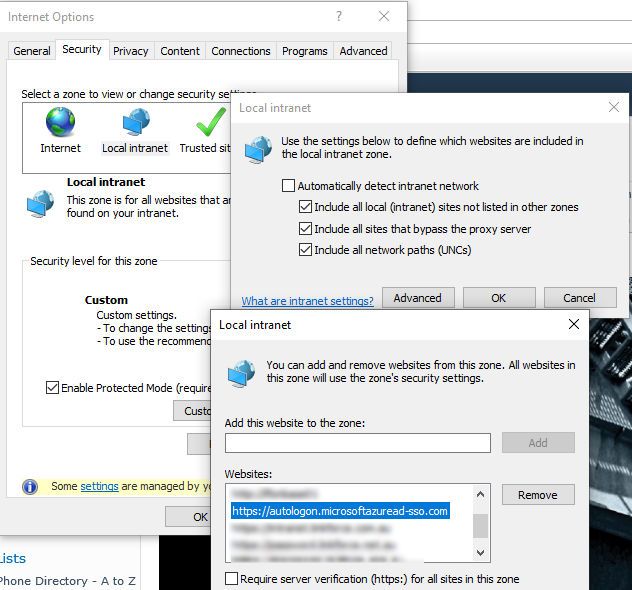
I have also enabled Azure Active Directory Seamless Single Sign-On (Azure AD Seamless SSO) which provides single sign-on to Azure AD services by sending the Kerberos requests directly through to Azure AD using a Computer Account AZUREADSSOACC.  If you want to understand how Azure AD Seamless SSO works, please refer to these articles here:


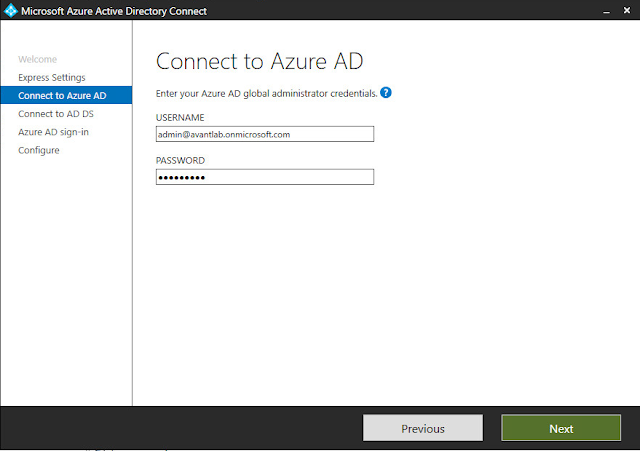
Enter an account with Azure AD Global Administrator rights into the wizard to connect to Azure AD.


Select the Active Directory forests you want to synchronise.  The tool can synchronise multiple forests to Azure AD.


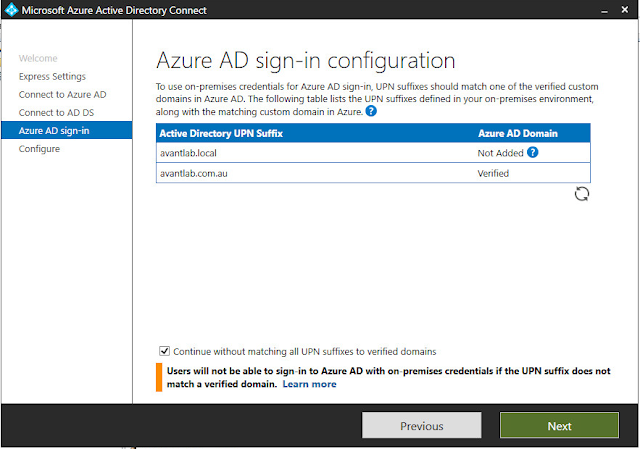
Select the on-premises attribute you want Azure AD to use as the username.  I ususally make this the userPrincipalName of the on-premises accounts, and I make sure the UPN is the users email address.  This can be done by setting up a UPN Suffix in Active Directory Domains and Trusts and assigning the UPN on each user account to match the UPN Suffix.

Users in my test lab have the following UPN suffixes:

user1@avantlab.com.au
user2@avantlab.com.au
user3@avantlab.com.au etc.


You can synchronise sub organisational units or the entire domain.  In this lab I'm synchronising the entire domain structure.


Azure was configured to manage the source anchor (the unique identifier) between users on premises and in Azure AD.  If you have a complex network with a lot of users you will need to think about what attribute you want to use as the source anchor.


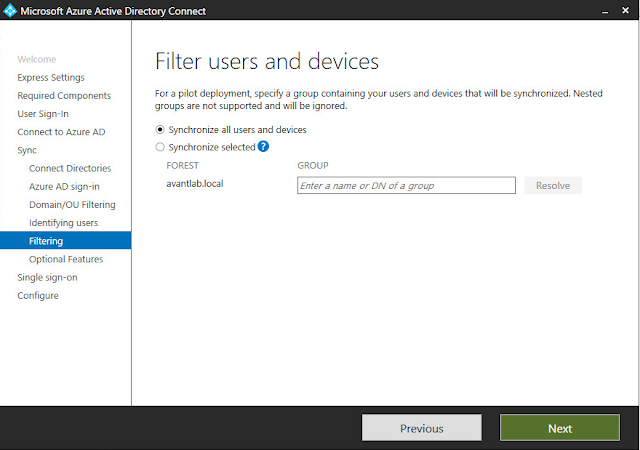
We are not filtering any users in this lab, we are synchronising everything.


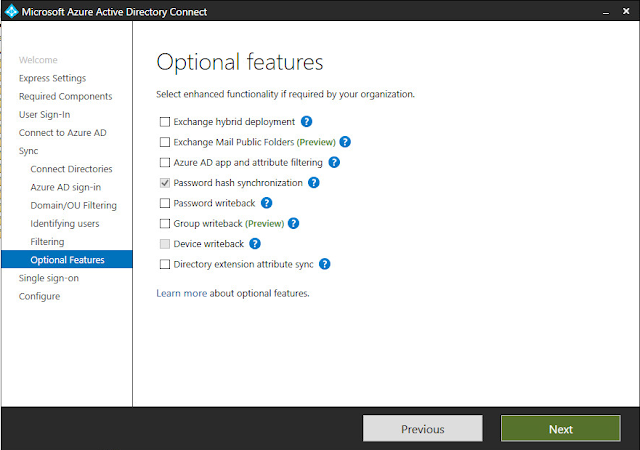
No additional features were need in this lab environment for Azure AD Application Proxy.  You may need additional features for other requirements.


You need to make sure your domain is verified in the Azure Portal by adding a TXT record to your public DNS.


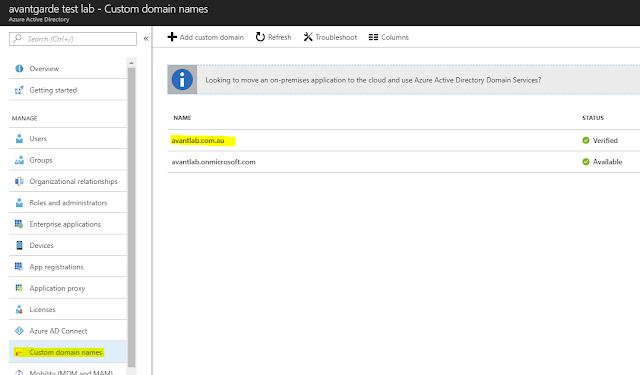
The wizard will show if its verified.


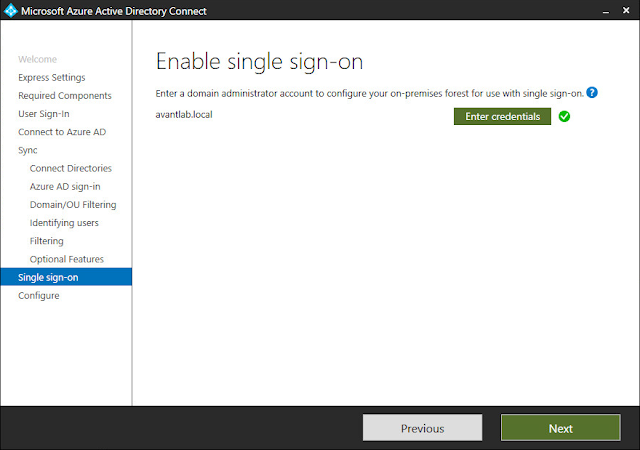
Enter Domain Admin credentials for an account on-premises which is required for Azure AD Seamless SSO.  You will want to use a service account for this with a super complex password.


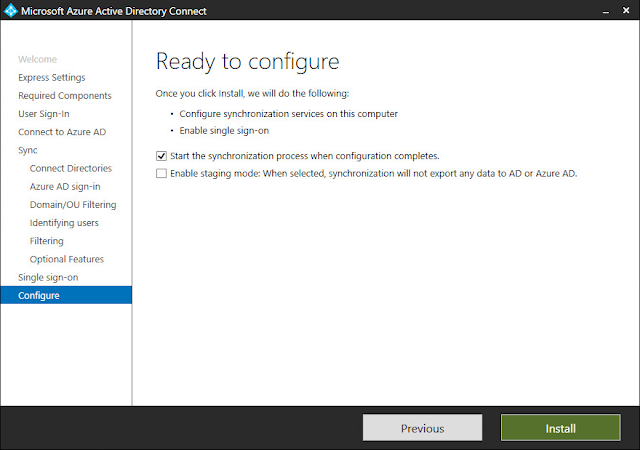
Kick off an initial synchronisation once the wizard is finished.


You will see the wizard created the AZUREADSSOACC for Azure AD Seamless SSO.


Close the wizard.


Upgrading Azure AD

By default your Azure AD subscription will be "Azure AD Free" which can run Microsoft Office 365.  In order to use Azure AD Application Proxy you must be running at least "Azure AD Basic", "Azure AD Premium P1" or "Azure AD Premium P2".

For a comparison between the various flavours of Azure AD, please see the following Microsoft website:


If you upgrade from Azure AD Free to a higher flavour, you will need to wait 24 hours for the changes to take effect within Azure.

Setting up Azure AD Application Proxy

The following steps need to be taken to setup Azure AD Application Proxy.

Navigate to Azure AD --> Enterprise Applications.


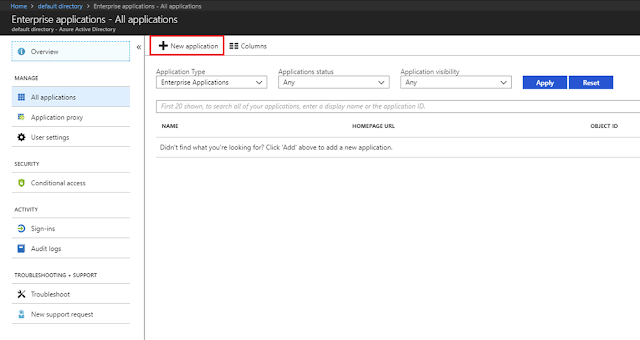
Select New Application


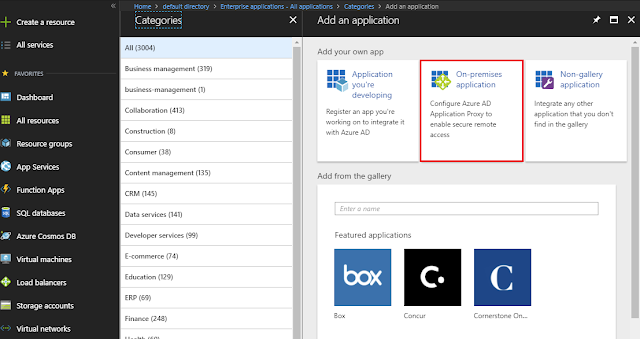
Select On-premises application.


If you haven't already upgraded from Azure AD Free you will get this warning.


Click the link and select Free Trial next to Azure AD Premium for lab purposes.  If your running a business, you will need to procure Azure AD Basic or higher before proceeding.


Activate the Azure AD Premium P2 trial in the lab and wait 24 hours for the activation to complete.


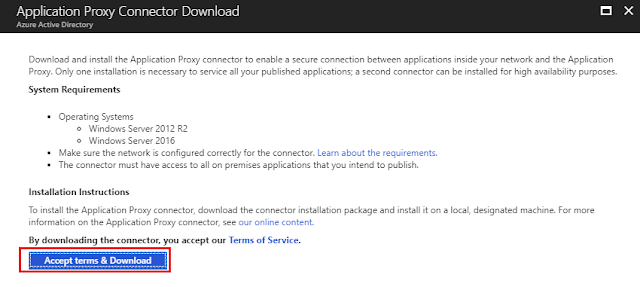
Next download the Application Proxy Connector application to install on the member servers.


You will need to agree to a license agreement before download can commence.


Make sure you run the setup on a Server 2012 R2 or Server 2016 computer.  In my lab to minimise the amount of virtual machines I have dedicated to this exercise, I installed the connector directly on an Exchange 2016 server.  For production deployments you should deploy the connector on a dedicated server and have more then one for redundancy.

Click through the steps below.


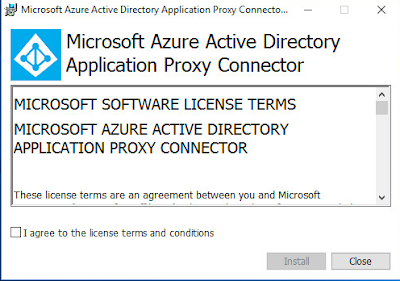
Sign-in to your Azure AD Tenancy with an Azure AD Global Tenancy account when prompted.


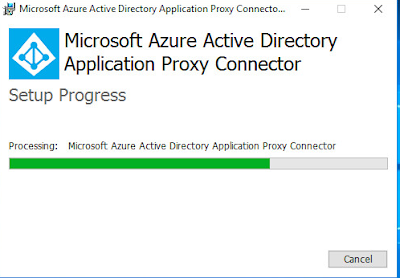
Let the tool install and connect to Azure AD.


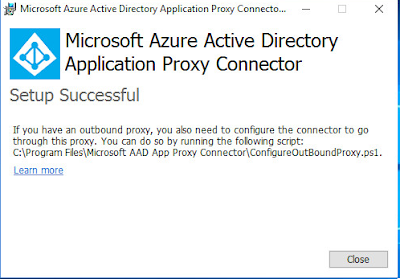
Click close when it was successful.


Notice on my Exchange 2016 server, it added the following two services:
  • Microsoft AAD Application Proxy Connector
  • Microsoft AAD Application Proxy Connector Updater

After the connector is installed, go back to Azure AD and add the on-premises application.
  • Give the application a name, this is what users will see in the myapps.microsoft.com portal.
  • Enter the Internal URL of the application.  This is the FQDN of the web based application on your internal network.
  • Select a DNS name for the service, you can use a Microsoft domain or lab purposes or your own domain which you will need to take care of the DNS changes yourself.  As this is a lab I just used the Microsoft msappproxy.net domain.
  • Under Pre-Authentication you can select from Azure Active Directory or Passthrough Authentication.  Azure Active Directory requires the password hashes to exist in Azure AD.
  • As we did not create a connector group it will just use the Default group.  For production deployments I recommend you create a Connector Group first and give it a descriptive name such as the datacentre/location where the connectors will exist.


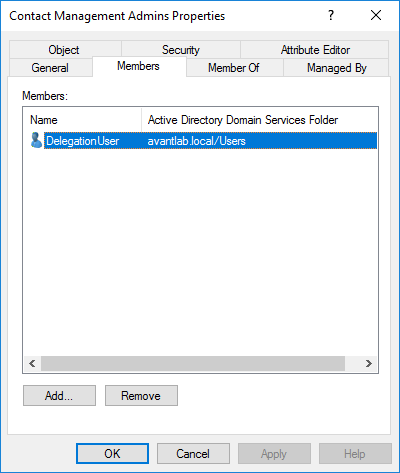
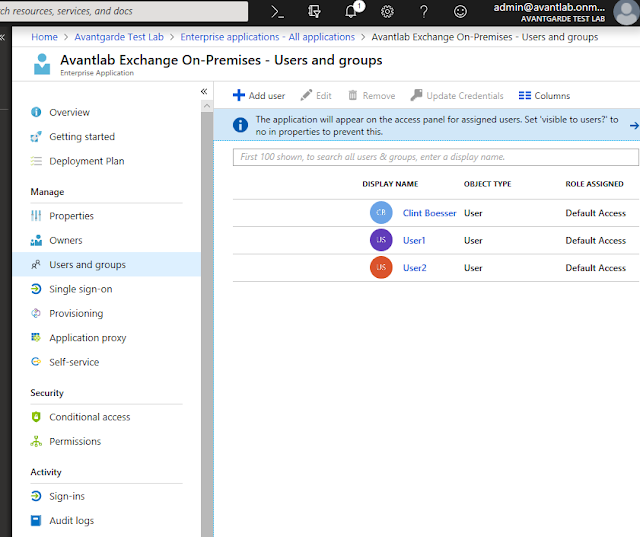
After you create the application, you will need to go into the properties of it and assign a couple of users the ability to access the application through Azure AD.  This is done through Users and Groups.


Lastly we need to setup Single Sign-on.  This ensures once a user signs into Azure AD through https://myapps.microsoft.com or going directly to the external facing URL of the application, they automatically get logged into the application and don't require signing in twice.  There are many Single Sign-on methods for Azure AD Application proxy including:
  • Password-based Sign-on
  • Linked Sign-on
  • Integrated Windows Authentication
  • Header-based Sign-on
If you would like an overview of each of these, refer to the following website:


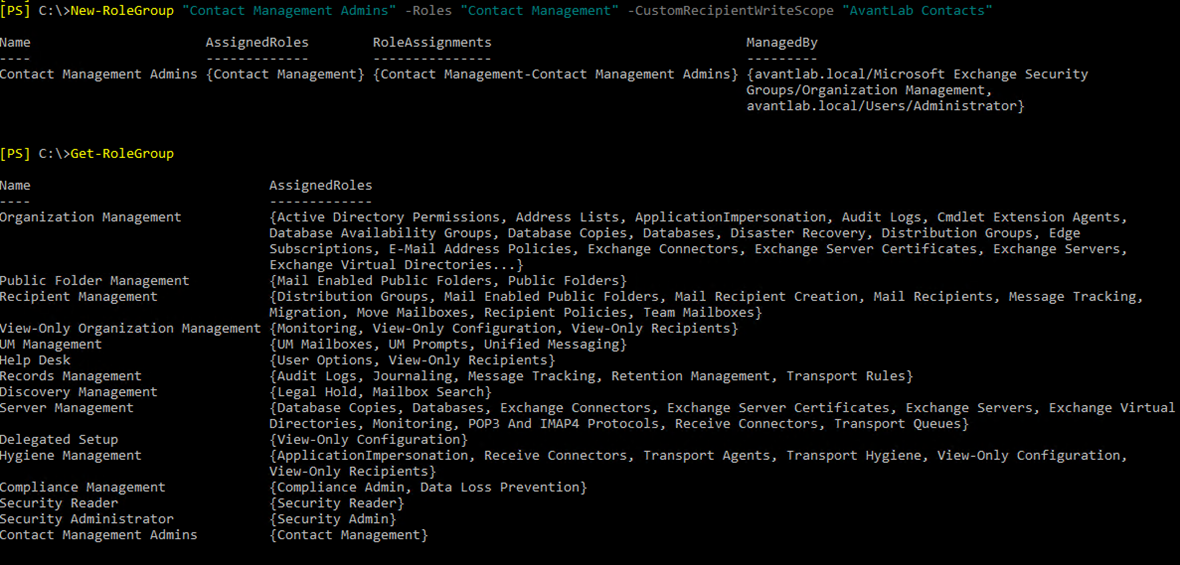
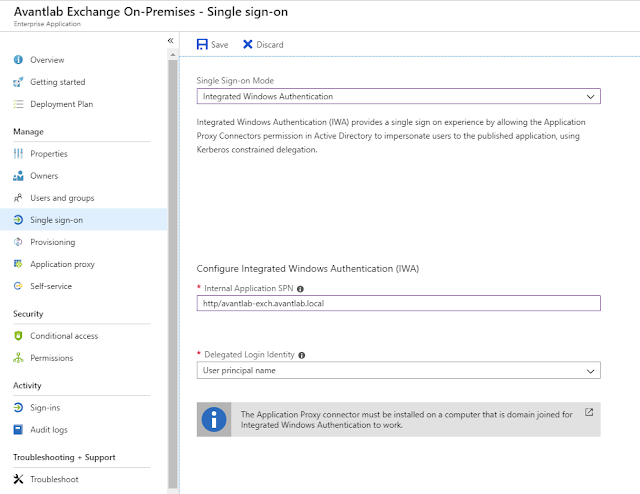
For Exchange Server, we used Integrated Windows Authentication for Outlook Web App as this is best for Exchange.  By default, Exchange is setup to use Forms based authentication for the web apps so we need to change this before configuring Azure AD.

As you see below I changed my Exchange Virtual Directories and restarted IIS so that we are using Windows Integrated Authentication for both ECP and OWA.  Forms based authentication is now disabled.


Next we need to configure Kerberos Constrained Delegation on the servers running the connectors.  Find the member server computer objects in Active Directory Users and Computers for your Connector machines and go to the Delegation Tab.  You will need to enable Advanced Features in Active Directory Users and Computers to see this.

Under Delegation, enter the computer objects for all your servers which you want to setup delegation for.  These are the servers running applications.  You can add multiple web servers here... Exchange, SharePoint and any other web servers you have internally that you want to publish.

The screenshot is off putting because the Connector and the Application are both on the same server, hence why it was delegated to itself.

For more information on Kerberos Constrained Delegation with Azure AD Application Proxy please refer to the following article:


Once Active Directory is setup, configure the Internal Application SPN of your internal server.  This is generally going to be:

http/fqdn-of-internal-app

Select the login identity we configured earlier in Azure AD Connect, which was User Principal Name.


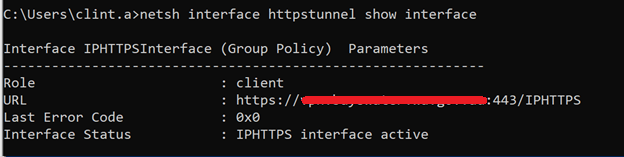
Next navigate to the public facing URL of your published application.  In my lab its:

https://exchange-avantlab.msappproxy.net

FYI: If your reading this a month later, I properly repurposed my lab and the address no longer exists.


After signing in to the application, we see that we are automatically passed through to Exchange OWA on-premises without being prompted for credentials again.


Azure AD Application Proxy Limitations

Azure AD Application Proxy is a new feature in Azure which offers customers basic reverse proxy functionality to publish on-premises applications through the cloud.  Whilst reviewing the product and setting it up in my lab, there currently are a few limitations which I believe will act as show stoppers for some companies looking to implement.  These limitations may be addressed in the future by Microsoft and I have submitted this feedback to the Azure AD product team - so fingers crossed.

Limitation 1: On-Premises Load Balancers are Still Required!

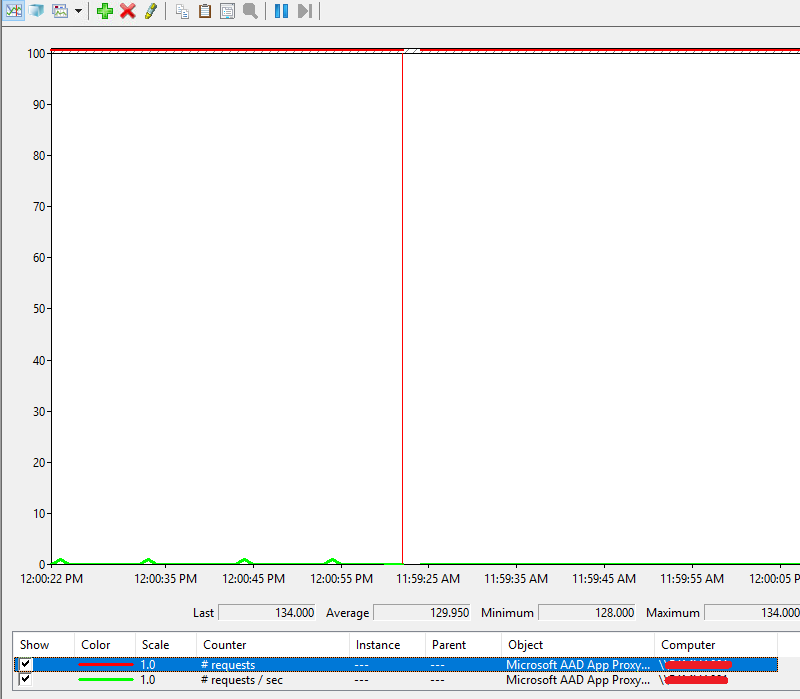
 Azure AD Application Proxy has great load balancing between the Azure service stack in the cloud and the on-premises connectors.  Load is distributed evenly across all connectors associated with a connector group.

The connectors however have no capability of distributing load across application servers in a web farm.  You are only able to configure a single FQDN on your internal network which represents your web application address.  This is shown in the following screenshot:


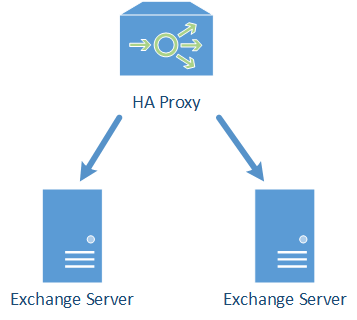
Many of my customers have server farms for important applications which need to be published.  The only way you can do this is by deploying an on-premises load balancing solution and advertising a Virtual IP address which the Azure AD Application Proxy connectors connect to.

Most leading load balancers such as F5 BIG-IP, KEMP, Barracuda Networks, Citrix NetScaler and many others also provide the reverse proxy functionality and are often more powerful then the functionality offered in Azure AD Application Proxy.  Of course there are free on-premises load balancing solutions such as Network Load Balancing or Application Request Routing (Microsoft IIS feature) but these are very limited and I would not recommend for production use.

What would be a great feature addition is if the connectors could handle this and perform basic health monitoring of application service endpoints and distribute load across the web farm.

Limitation 2: No way to handle different authentication methods within a Web Application

Some web applications have different authentication methods for each virtual directory.  A good example of this is Microsoft Exchange which I published, each of the virtual directory's have different authentication settings which Azure AD Application Proxy cannot accommodate.

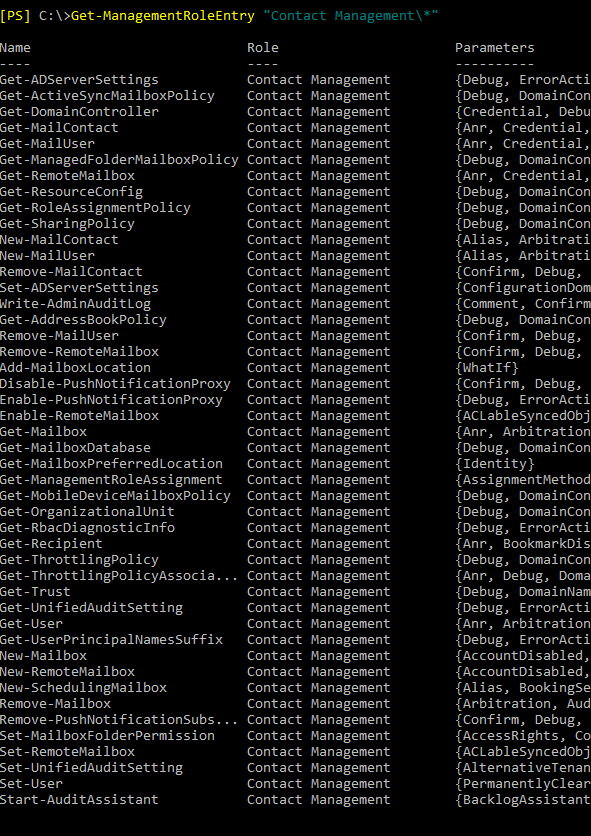
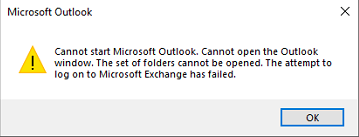
Below is a list of virtual directories on an Exchange 2016 frontend website.  I configured the ECP and OWA virtual directories to use Integrated Windows Authentication however if I try and establish an ActiveSync connection from a mobile phone to exchange-avantlab.msappproxy.net it will fail, as the Microsoft-Server-ActiveSync virtual directory uses basic authentication over SSL.


To get around this, it would be possible to create multiple Azure AD Application Proxy Apps for each virtual directory with separate SSO configuration, but a painful approach.  It is also possible to configure Autodiscover to return different public FQDN's on the ExternalURL setting for each of the virtual directories listed below.

The workaround will work but it is not ideal!

Limitation 3: No way to limit/restrict Application Sub Directories

Almost every reverse proxy solution I have worked with on the market have a way of restricting access to some components of the application through the proxy - but not Azure AD Application Proxy!

For example a company may want to allow all applications internally, but block EWS and PowerShell virtual directories remotely from the Internet.

[ALLOW] https://exchange-avantlab.msappproxy.net/owa
[ALLOW] https://exchange-avantlab.msappproxy.net/microsoft-active-sync
[ALLOW] https://exchange-avantlab.msappproxy.net/oab
[ALLOW]https://exchange-avantlab.msappproxy.net/ews
[ALLOW] https://exchange-avantlab.msappproxy.net/autodiscover
[BLOCK]https://exchange-avantlab.msappproxy.net/powershell
[BLOCK]https://exchange-avantlab.msappproxy.net/ecp
With Azure AD Application Proxy there is no way to do this, publishing an application through Azure AD will always publish the entire application.

Final Thoughts

I believe Azure AD Application Proxy is a fantastic low cost method for securely publishing on-premise services to the Internet.  For customers already using the Azure stack to provide users access to applications via the https://myapps.microsoft.com portal, this allows the customer to add additional on-premises applications to users through the same familiar interface.

Azure AD Application Proxy is new technology and some of the limitations which I would like to see in the product may come in the near future.

Thanks for reading and I hope this post was useful.

Pressure mounting from Microsoft on Skype for Business Usage

$
0
0
Everyone in the IT Community knows by 2018 that Microsoft's primary vision is to no longer to make software for on-premises usage but to focus on their cloud portfolio and moving customers intellectual property (documents, email, data) who use Microsoft applications into Microsoft owned datacentre.  Many companies have made the migration to Azure and Office 365 over recent years.

It was surprising to many of us that on the 1st of October, 2018 - It was announced that all new Office 365 customers under 500 seats would no longer receive access to Skype for Business.  This news was posted here:

https://support.microsoft.com/en-au/help/4465277/microsoft-teams-now-the-primary-client-for-meetings-and-calling

The Microsoft Teams client was officially launched only 14 March 2017 and ever since the launch, Microsoft has been mounting pressure for Skype for Business to go end of life.  It has only been a year and a bit since Microsoft are now making Microsoft Teams the only client of choice for businesses under 500 seats in Office 365 removing the option.

There are still a few things that I personally do not like about this new collaboration client such as the Interface and Features.

Skype for Business gives users the familiar "MSN Messenger" style layout, slick, clean and made primarily for instant messaging, presence and voice/video calls.  Teams is a completely different layout like in my screenshot below.


Microsoft Teams also has a file section on the left side pane allowing users to easily access data in One Drive or SharePoint Sites and allows multiple users to collaborate on the documents and chat real time about works.  This however assumes that companies store all their documents in a cloud service.  Some companies still do not upload documents and data to a public cloud service provider and only want to utilise Office 365 for instant messaging and collaboration without uploading sensitive information to the cloud.  The Files collaboration feature may be something that some clients do not want as part of an Enterprise instant messaging application.

Skype for Business is also heavily utilised by companies to perform simple desktop sharing to allow users to collaborate on works.  Microsoft Teams can also do this but you need to be in a Teams Meeting for this functionality to be available.  This is something that has annoyed many users and has been a feature request which Microsoft has ignored for a while and is all over the forums.


Whilst Microsoft Teams is some cool software, one thing which I have always liked in the IT world is freedom, the ability to have the option to choose the best tool for the task.  I personally don't like being forced to use a product or solution which is the new flavour of the month.  Nor do I like how some companies are forcing companies to adopt a cloud solution when not all businesses want to store intellectual property in a public datacentre for various business reasons.  All businesses should have the freedom to adopt technology as they feel fit.

Microsoft causing issues for on-premises Exchange Customers

$
0
0
Microsoft is causing issues for on-premises customers running Exchange to try and push customers to move to their servers in Office 365.  After the release of 16.0.6741.2017, the Click 2 Run (C2R) version of the Outlook client for the PC is prioritising O365 for Autodiscover queries above all other Autodiscover methods (SCP, HTTPS root domain etc).

This causes problems for customers who aren't using O365 for mail service, especially if either of these conditions are true:

1. The user has a mailbox in the O365 service which is not being used. This can occur if the user has inadvertently had an Exchange license assigned.

2. The user has a personal Office subscription but has used their business email address to configure it.

The issue which users experience is they are prompted for Authentication, when the users enter their details the login fails as it's effectively requesting authentication against the O365 service.

This behavior also breaks the experience for existing profiles, not just newly created ones.

The “workaround” we have is to add a registry change to end users PC to bypass the O365 endpoints. From this article:

https://support.microsoft.com/en-gb/help/2212902/unexpected-autodiscover-behavior-when-you-have-registry-settings-under 

This property needs to be set to a DWORD value of 1: ExcludeExplicitO365Endpoint

This needs to be done on each computer running Outlook.  For managed devices on a Corporate Network we can push this out with management tools such as SCCM or Group Policy Preferences but for non-managed devices this is a huge overhead for IT staff dealing with end user support and the issues experienced.

This workaround is hard to manage, client specific, and will need to be reverted if the customer ever does in fact move to O365 so that the Direct Connect method can work again.

The process of how Autodiscover is configured on Exchange Servers is documented on the following link and now even if we have setup Autodiscover correctly, by default Outlook clients will have issues setting up Outlook profiles.

https://docs.microsoft.com/en-us/exchange/client-developer/exchange-web-services/autodiscover-for-exchange

The feedback of removing this feature for Outlook Profiles configured against an on-premises Exchange Server has been provided to Microsoft from numerous frustrated IT Professionals.  Microsoft's response to this was as follows:

We cannot fulfill this request as we will continue to optimize for the Office 365 experience. The supported implementation of Autodiscover is documented here, https://support.microsoft.com/en-us/help/3211279. Any ongoing changes and improvements will be documented in the article. We appreciate your feedback and take every request with consideration, whether we can move forward with it or not.
-Outlook Team

Here are some facts:
  • There are still more on-premises customers running Exchange then customers in Office 365.
  • Customers on-premise pay good money via various Microsoft licensing programs to utilise these products.
  • Not all customers will migrate to the cloud - there will always be customers who want to keep intellectual property on-premises instead of moving to a shared public cloud environment.
  • Making changes such as the above which will cause issues to millions and millions of on-premises customers is not acceptable.
Due to the various complaints coming in from the community, after posting the above statement, Microsoft IMMEDIATELY closed comments preventing their customers from venting further frustration.  For more on this please see:

https://outlook.uservoice.com/forums/322590-outlook-2016-for-windows/suggestions/36052099-stop-prioritizing-o365-for-autodiscover?tracking_code=bcd47b537c1d87aa7fa3220e75bd96a2

One would hope that these on-premises authentication requests hitting Microsoft's O365 servers are just authentication requests, and Microsoft are not keeping these credentials.  If they were, this would be a directory harvesting exercise to the likes we have never seen before.

As a consultant who has specialized in Microsoft technologies for a long time - i'm very disturbed and appalled by the companies actions.  Microsoft get paid good money either way (if the customer is on-premises or in the cloud) and it is up to the customer to make a decision on where they want to store their intellectual property!

Cisco Router messed up SMTP TLS with Office 365

$
0
0
Mail routing from Office 365 to an on-premise Exchange Server was working successfully.

Mail flow from the on-premises Exchange Server to Office 365 was failing.

Email in the queue was generating:

LastError : 451 5.7.3 STARTTLS is required to send mail


I had a valid SMTP certificate bound to with Enable-ExchangeCertificate and my Send Connector to Office 365 was TLS enabled - yet we had a TLS error.

This was caused by a Cisco Router 1941 with SMTP inspect causing issues.

The router has the following line in the config:

"ip inspect name CBAC smtp"


After removing this line with "no ip inspect name CBAC smtp" mail flow started working successfully.

Exchange 2010 and Exchange 2016 co-existance Free/Busy Issues

$
0
0
I have a lab environment containing Office 365, Exchange 2016 and Exchange 2010.  Free busy is not working from O365 --> 2010 or Exchange 2016 --> 2010.

The Autodiscover record points all EWS requests to Exchange 2016 Web Services Virtual Directory for the Availability Service.

The Availability Service on the Exchange 2016 server is failing to lookup requests on Exchange 2010 mailboxes.

It is also important to note, the 2016 server is the one setup in Hybrid with O365, so it is responsible for looking up all Availability requests on-premises.

After doing some research into the issue, I identified that the InternalNLBBypass URL on the Exchange 2010 server must point and resolve directly to the Exchange 2010 server.  It must not be set to $null or point to the Availability Service on Exchange 2016 (in my lab that being mail.avantlab.com.au).

Exchange 2016 Web Services Virtual Directory:


Exchange 2010 Virtual Directory:


As soon as setting the InternalNLBBypassURL to point directly at Exchange 2010, this resolved the issue.

See my lab all working:

  • Arya is in Office 365
  • Jon is on Exchange 2010
  • Bran is on Exchange 2016
And yes, they are all Game of Thrones characters :)


I blogged this one as I could not find much information online regarding this!

Office 365 Tab not working in Exchange Admin Center

$
0
0
After running the Hybrid Configuration Wizard, the Office 365 tab doesn't work by default which catches out many people.  The tab is found at the top of Exchange Admin Centre where it says "Enterprise" and "Office 365".


When you click Office 365 it directs to "Get the most from Office with Office 365" webpage asking you to purchase the product.


After running the Hybrid Configuration Wizard, you must schedule an outage and perform an IISReset on your Exchange 2016 CAS Servers.  After doing an iisreset you will find that the Office 365 tab works as expected.

Azure AD Seamless SSO - Prompts on Connecting to aadg.windows.net.nsatc.net

$
0
0
At a customer site when attempting to access the https://myapps.microsoft.com/companydomain.com portal to test Single Sign-on with Azure AD, we were constantly being prompted "Connecting to aadg.windows.net.nsatc.net".

 
We had gone through significant troubleshooting on the issue but could not find a resolution online.  This troubleshooting included but was not limited to:
  • Confirmed that we have received the Kerberos ticket from the AZUREADSSOACC with “klist get AZUREADSSOACC”
  • Added https://autologon.microsoftazuread-sso.com and https://aadg.windows.net.nsatc.net to the Trusted Sites
  • Confirmed the servicePrincipalNames on the AZUREADSSOACC are correct
  • Validated the Single sign-on is enabled on the Azure AD Portal and in the Azure AD Connect tool
Troubleshooting sites we went through included:

https://docs.microsoft.com/en-us/azure/active-directory/hybrid/tshoot-connect-sso

After speaking with Microsoft, they mentioned that "https://autologon.microsoftazuread-sso.com" must also be in the "Local Intranet" zone.
 
  
This is due to the default security setting "Automatic logon only in Intranet zone".  If this was set to "Automatic logon with current user name and password" this would have also fixed the issue but is not as secure.
 
 
After making this change Single Sign-On works.

Unable to remove RDS Session Host

$
0
0
A customer had a failed RDS Session Host which needed to be removed from a cluster.  We were not able to login to the failed host as it was blue screening and needed to be forcefully removed.

Even using PowerShell with the -force switch we were unable to remove the server getting the following error:

"Unable to cleanup the RD Session Host server"


To remove the server we needed to install SQL Management Studio and connect to the RD Broker Windows Internal Database (WID) which is a lightweight install of MS SQL.

SQL Management Studio was downloaded and installed from the following link:


https://go.microsoft.com/fwlink/?linkid=2094583

Make sure you run SQL Management Studio as "Administrator" and you should be able to connect to the following instance as a Domain Admin:

\\.\pipe\MICROSOFT##WID\tsql\query


The server needs to be removed from two tables:
  • rds.Server
  • rds.RoleRdsh
Make note of what ID number the server you want to remove is... mine is ID 4 as shown in the screenshots below.


Next I used the following command to remove the failed server from the RD Broker database:


use RDCms;
deletefrom rds.RoleRdsh where ServerID ='4';
use RDCms;
deletefrom rds.Serverwhere Id ='4';


I strongly recommend a full backup of the SQL database be taken before making any changes.

Hope this post was helpful.

Exchange RBAC Example - Provide User access to manage Contacts

$
0
0
In June 2010, I wrote an article explaining how Exchange Role Based Access Control (RBAC) works - a new feature released with Exchange 2010.  RBAC is still heavily utilised today with Exchange 2019 and Office 365 following these principals.

My article from 2010 can be found here:

https://clintboessen.blogspot.com/2010/06/exchange-2010-role-based-access-control.html

After having not worked with RBAC for while, I found myself re-reading the principals of RBAC and re-running through what is involved to configure the security model.  Knowing this well is also essential and I'm doing my Exchange upgrade exam this Friday (MS-202 Microsoft 365 Messaging Administrator Certification Transition) so a refresher on these principals is always handy!

I had a requirement given to me by a customer which I need to spin up in my test lab, and I thought whilst I lab the requirement it might be a good idea to write a quick blog post on the process of implementing the RBAC changes.

RBAC Requirement

"A user in the business must be able to create mail enabled contacts for external workers.  This user must only be able to create mail enabled contacts and no other objects, and the contacts must be stored under a specific organisational unit only".

RBAC Security Model

With the design of RBAC, The Exchange Product Team referred to RBAC as the Triangle of Power.  This is elaborated in this blog post here:

https://techcommunity.microsoft.com/t5/Exchange-Team-Blog/RBAC-and-the-Triangle-of-Power/ba-p/597147

The security model has three arms:
  • Step 1: Where - Where are the objects stored that we want to change or what attributes or identifying factors must the object have?  They can be in a security group, organisational unit, anyone with a job title set to XYZ... the possibilities are endless.  My requirement for "Where" is contacts must be contained only under a particular organisational unit.
  • Step 2: What - What is what you want to do.  What Exchange PowerShell cmdlets do you want to give the administrator access to be able to run?  Think of "What" as the access rights you wish to delegate.  The commands we are interested in for my example are New-MailContact and Remove-MailContact.
  • Step 3: Who refers to who is able to perform the operation.  Which user do you want to delegate control to in order to run the commands under the What section.
This all glued together by a concept known as Management Role Assignments.


I will break this down using my three headers listed above.

Step 1: Where

In my lab environment we only want contact objects to be changed under the OU "Contacts".

avantlab.local/Contacts

As a result we are going to create a new "Management Scope".  By default all RBAC Management Roles have access to the entire Active Directory forest and no Management Scopes exist. 

I'm locking it down to the Organisational Unit based on a RecipientRestrictionFilter with the following query:

New-ManagementScope "AvantLab Contacts" -RecipientRestrictionFilter {DistinguishedName -Like '*,OU=Contacts,DC=Avantlab,DC=Local"}


Step 2: What

Now we are interested in assigning "What" cmdlets we want the admin to be able to run.  The "What" refers to two cmdlets:
  • New-MailContact
  • Remove-MailContact
Cmdlets are linked as "ManagementRoleEntries" to objects known as "ManagementRoles".

There are a few rules you need to understand when creating new Management Roles for the "what section":
  • It is not possible to simply create a new Management Role and add the cmdlets you wish to run under the role as Management Role Entries.  All custom (non default) Management Roles must be linked to a parent Management Role.  Parent Management Roles are ones that come by default with Microsoft Exchange Server "out of the box".  Think of it as your "cloning" the parent Management Role to create your "Custom" management role.
  • It is not possible to add additional cmdlets that were not in the parent - you can however remove cmdlets.
Base on these two rules, when your creating a new Management role your essentially taking a management role similar to what your trying to create "with too much access", and removing the additional access from the role.

So the first step I need to do is find an existing Management Role that contains the two cmdlets I'm interested in.  I did this by running the following cmdlets:

Get-ManagementRole -Cmdlet New-MailContact
Get-ManagementRole -Cmdlet Remove-MailContact


A Management Role that contains both these cmdlets is "Mail Recipient Creation" - so this is the Management Role we will use as the template for creating my new Management Role.

I'm calling my new Management Role "Contact Management" and I'm basing it on "Mail Recipient Creation".  As a result, the new Management Role was created with the following cmdlet:

New-ManagementRole -Name "Contact Management" -Parent "Mail Recipient Creation"


Now the default "Mail Recipient Creation" Management Role had more cmdlets then we want the delegated access users to have access to.  To list all the cmdlets that this Management Role can run, execute the following command:

Get-ManagementRoleEntry "Contact Management\*"


We want to remove all cmdlets not related to our Contact Management.  Most importantly we want to remove any cmdlets with "New-, Set-, Start-, Remove-, Disable-, Write-, or Remote-" as they have elevated access.  "Get-" cmdlets you cant make changes, you can only view data.

To remove the unwanted cmdlets from the Contact Management Management Role the following cmdlet was used:

Get-ManagementRoleEntry "Contact Management\*" | where {$_.name -eq "New-MailUser"} | Remove-MagementRoleEntry


And a few Get- commands I wanted removed:


This left the Contact Management role with the following cmdlets associated:

Get-ManagementRoleEntry "Contact Management\*"

This left Management Role access to run the following cmdlets.  The "Get-" commands present cannot make any changes or expose any information that I would not want the delegated user to see.  As a result I didn't clean these up but you can if you want.  Most importantly, the New-MailContact and Remove-MailContact cmdlets were left present.


Step 3: Who

The last step is the "delegation of control", which staff members will have access to be able to run the Cmdlets in the Management Role "Contact Management".

To determine the "Who" I created a new Role Group called "Contact Management Admins" defining the "Contact Management" Management Role and the "AvantLab Contacts" Management Scope.  This was done with the following command:

New-RoleGroup "Contact Management Admins" -Role "Contact Management" -CustomRecipientWriteScope "AvantLab Contacts"


This creates a new Group under Microsoft Exchange Security Groups in Active Directory for the new Role Group.


Testing the RBAC Security

I went and added a user called DelegationUser to the Contact Management Admins group.


Logging into Exchange Control Panel (now known as Exchange Admin Centre (EAC) in later revisions of the product), the webpage only renders the areas of EAC the user has access to.  RBAC and being "Cloud Friendly" are the two primary reasons the old Exchange Management Console from Exchange 2007/2010 was retired.


The user can successfully run the New-MailContact command via the webpage and place a Contact object under the Contacts OU - the Step 1: Where? section.


This is shown in the following screenshot:


However if I try and create a contact in the default Users container, I get the message:

'avantlab.local/Users/DefaultUser Container' isn't within your current write scopes.  Can't perform safe operation.


This is because Step 1 "Where"... the management scope is restricted to only the Contacts OU.  Obviously Management Scopes are ridiculously granular and you can go far beyond restrictions of something as basic as an OU.


 What about the Glue?

Stop sniffing the glue Clint, I thought there was Glue in between holding these objects together as shown in the diagram below.

When I created the Role Group I also specified the Management Role and Management Scope.  This automatically created a ManagementRoleAssignment called "Contact Management-Contact Management Admins" as shown in the screenshot below.

Creating ManagementRoleAssignments manually useful especially when you want to create associations between existing objects that already exist on the system.


If we look at the Management Role Assignment "i.e. the glue" closer, we can see that it has all three components created above are "glued" together.
  • The Management Scope... Step 1: Where (CustomRecipientWriteScope: AvantLab Contacts)
  • The Management Role... Step 2: What (Role: Contact Management)
  • The Role Group... Step 3: Who (RoleAssigneeName: Contact Management Admins)


Hopefully this step by step guide to using Role Based Access Control was useful and can be put to use within your environment!

Preparing Exchange Topology - PrepareAD, PrepareSchema, PrepareDomain etc

$
0
0
I'm about to sit the Exchange Upgrade Exam (MS-202: Microsoft 365 Messaging Administrator Certification Transition) on Friday and currently doing a last minute brush up.  Having done all the certifications in Exchange Server since MCSE: Messaging 2003 all the way through to the latest Exchange 2016 exam (70-345) I know the types of Questions Microsoft has asked in the past.

One area tested that I recall from all previous exams was the process for preparing schema and domain...

Whilst the latest Exchange 2019 Exams are definitely going to be heavily focused on Exchange Online in Office 365 given this is Microsoft's primary drive, they also test on all the on-premises content.  I wouldn't be surprised if topology preparation is tested once again... even though in my professional opinion it is not an item of significant importance given that over 99% of businesses simply rely on the Cumulative Update wizard to automatically extend the schema and prepare the domains.

In Exchange 2003 we had the setup.exe /forestprep and setup.exe /domainprep.

From Exchange 2007 all the way to Exchange 2019 we have a number of commands now including:
  • Setup /PrepareAD
  • Setup /PrepareSchema
  • Setup /PrepareDomain
  • Setup PrepareAllDomains
I remember there use to be a fantastic article on TechNet which gave a breakdown of exactly what each of these commands did - however after spending a good 5 minutes on Google i came up short trying to find the article and not sure if it is still published.

I could find no "clear" breakdown of each of these commands and the descriptions given on the installer help is useless as shown below:


I did come across the book however Exchange Server 2010 Administration: Real World Skills for MCITP Certification and Beyond (Exams 70-662 and 70-663) published by Joel Stidley and Erik Gustafson that touched on these commands in more detail.

Given the lack of content covering these commands, I decided to do a quick blog post.

Setup /PrepareSchema

This command does one thing, prepares the schema (additional class objects and attributes required for Exchange Server).  It must be run in the same Active Directory site as the Schema master.

To run this command you must be a Schema Admin.

Setup /PrepareDomain

This command must be run in each domain within an Active Directory forest.  This command simply creates special domain accounts and security groups in each domain for hosting Exchange Servers.  Thing of it as creating some additional "Active Directory" objects, no schema extensions within the "Domain Partition" only.

To run this command you must be an Enterprise Admin.

Setup /PrepareAD

The PrepareAD command performs three things:
  • Prepares the Schema if not done already (same as PrepareSchema)
  • Prepares the Domain (for the forest root domain only in a multi-domain forest)
  • Creates the Global Exchange Objects in the Configuration Partition.
It is important to note, PrepareAD runs the PrepareSchema command for the forest and PrepareDomain for the forest root domain only (if not done already).

For a single forest, single domain environment - PrepareAD is the only command you need to run.

If you have multiple child domains or new tree domains in the same Forest, after you run /PrepareAD in the forest root domain, you will need to /PrepareDomain for each of the additional domains within the forest.

To run this command you must be an Enterprise Admin and a Schema Admin.

Setup /PrepareAllDomain

If you have multiple domains in an Active Directory forest and you wish to run /PrepareDomain across all domains at the same time, this is what the /PrepareAllDomains command is for.

Hopefully this post has been useful.

Basic Authentication being Disabled in Exchange Online

$
0
0
On the 20th of September 2019, Microsoft announced they are turning of Basic Authentication across all protocols in Exchange Online apart from SMTP.  Basic Authentication will be turned of on all web services on 13th of October 2020 including POP and IMAP.  This was published here:

https://techcommunity.microsoft.com/t5/Exchange-Team-Blog/Improving-Security-Together/ba-p/805892

Microsoft are pushing people to use Modern Authentication (OAUTH2) which provides numerous advantages over basic authentication.  Basic Authentication is secure provided it is encrypted with TLS and has been used since Exchange 5.5 and is still heavily used now even in Exchange Sever 2019, however there are more secure ways which provide support for additional security such as Multi Factor Authentication (MFA).

I have issues with this announcement - many customers that have enterprise applications which connect to Exchange via basic authentication using POP or IMAP4 over TLS - and this is the only connectivity option these applications support.

Microsoft say in the announcement that they know this will cause potential disruption but they want to force companies to adopt the new authentication technology.  I have many customers with help desk ticketing systems, ERP solutions, document management, life-cycle management system etc that only support basic authentication.  Not to mention, as of 26/09/2019 Microsoft still doesn't even support Modern Authentication on POP or IMAP (commonly used for applications to connect) and say in their article "we are planning on adding OAuth Support to both POP and IMAP in next few months".  Great - gives application vendors lots of time to prepare!

The benefit of Exchange Server on-premises is you can control your own destiny and if you have applications you have invested 10 million+ into developing or rolling out, you wont expect that your cloud vendor will suddenly flick a switch and cause your application to stop functioning correctly.

If your using Basic Authentication in O365 - and I know many of you reading this article would be in some extent (most likely mobile phones) - make sure you address this, install the Outlook for Mobile application, upgrade your enterprise applications to ensure your ready for this significant change.

Patching old Exchange 2013 or Exchange 2016 servers

$
0
0
When patching Exchange 2013 or Exchange 2016 from an old Cumulative Update version, it is common to need to hop through multiple versions of Exchange Server.

For example, if your on Exchange CU11... to remain in a supported state you will need to patch as follows:
  • Upgrade Exchange 2013 from CU11 to CU15.
  • Upgrade the .NET Framework to 4.6.2
  • Upgrade from Exchange 2013 CU15 à CU20
  • Upgrade .NET Framework to 4.7.1
  • Upgrade from Exchange 2013 CU20 à CU22
  • Upgrade .NET Framework to 4.7.2
  • Upgrade from Exchange 2013 CU22 à CU23
See the support matrix here:

https://docs.microsoft.com/en-us/exchange/plan-and-deploy/supportability-matrix?view=exchserver-2019


The problem that most people on old patch levels find, is Microsoft has removed many of the older CU updates which makes moving from an old patch level a difficult task.

Luckily we have a legend that has posted all the Exchange updates here:


Very handy link to keep in your favorites.

Direct Access not working with Windows Firewall Enabled on Client

$
0
0
We had an interesting issue with Microsoft Direct Access on Windows 10 latest build 1909.

  • When Windows Firewall is disabled, Direct Access works on the client.
  • Enabling Windows Firewall on the client breaks Direct Access resulting in no connection.
Symptoms of Issue

Here is the symptoms we were receiving:

Get-DAConnectionStatus returned "CouldNotContactDirectAccessServer"


netsh interface httpstunnel show interface shows the Interface is Active

IPHTTPS interface active
Last Error Code 0x0


The issue appears to be with Name Resolution Policy Table (NRPT).  When Windows Firewall was enabled on the client, you were able to ping IPv6 addresses on the Direct Access server through the tunnel but all name resolution failed.

For example, you can ping the tunnel endpoints discoverable using the Get-DAClientExperianceConfiguration cmdlet on the client.  You can also ping IPv6 addresses of hostnames previously resolved when the Windows Firewall was in a disabled state.  For example, whilst Windows Firewall was in a disabled state, ping domain.local (your AD forest name), copy the IPv6 address, re-enable Windows Firewall and you will notice you can resolve it by the IPv6 address, not by hostname using NRPT.

Resolution

The issue was caused by Windows Firewall set to a disabled state on the server.

What we found was when the Windows Firewall is disabled on the server, Windows Firewall must be disabled on the client.

If DA Server Firewall is disabled, but DA client Firewall is enabled - Direct Access breaks.
If DA Server Firewall is enabled, but DA client Firewall is disabled - Direct Access breaks

You must have Windows Firewall disabled on both the DA Server and DA Client, or enabled on both the DA Server and DA Client.

We also identified another issue on the DA server with regards to Windows Firewall being disabled.  In our environment, disabling Windows Firewall on the DA Server breaks Direct Access reporting in the "Remote Access Management" console.

As a result, it is strongly recommended to keep Windows Firewall enabled on both the DA Server and DA clients.

Unable to Install Azure Powershell Module

$
0
0
I had an issue where i was unable to install the Azure PowerShell Module on Windows Server 2016.  When attempting to install the module the following error was experianced.

PackageManagement\Install-PackageProfider : No match was found for the specified search criteria for the provider 'NuGet'. The package provider requires 'PackageManagement' and 'Provider' tags. Please check if the specified package has the tags.


To fix this issue i needed to enable Strong Crypto on the .NET framework to ensure TLS 1.3 was supported.  This was done with the following commands.


Set-ItemProperty -Path 'HKLM:\SOFTWARE\Wow6432Node\Microsoft\.NetFramework\v4.0.30319' -Name 'SchUseStrongCrypto' -Value '1' -Type Dword
Set-ItemProperty -Path 'HKLM:\SOFTWARE\Microsoft\.NetFramework\v4.0.30319' -Name 'SchUseStrongCrypto' -Value '1' -Type Dword

Before:


After:


After making this change, we were successfully able to install the Azure PowerShell module.


Hybrid Configuration Wizard unable to Validate Hybrid Agent for Exchange Use

$
0
0
When running a "Modern Exchange" Hybrid Deployment with deploying Hybrid Agents for a customer, we ran into an issue where the Hybrid Configuration Wizard (HCW) failed on "Validate Hybrid Agent for Exchange usage".

Symptoms of Issue


In the Hybrid Configuration Wizard log we had the following error:

FINISH Time=320.5s Results=Failed The connection to the server 'CUSTOMER-APPID-GUID.resource.mailboxmigration.his.msappproxy.net' could not be completed., The call to 'https://CUSTOMER-APPID-GUID.resource.mailboxmigration.his.msappproxy.net/EWS/mrsproxy.svc' failed. Error details: The HTTP service located at https://CUSTOMER-APPID-GUID.resource.mailboxmigration.his.msappproxy.net/EWS/mrsproxy.svc is unavailable.  This could be because the service is too busy or because no endpoint was found listening at the specified address. Please ensure that the address is correct and try accessing the service again later. --> The remote server returned an error: (503) Server Unavailable.., The HTTP service located at https://CUSTOMER-APPID-GUID.resource.mailboxmigration.his.msappproxy.net/EWS/mrsproxy.svc is unavailable.  This could be because the sevice is too busy or because no endpoint was found listening at the specified address. Please ensure that the address is correct and try accessing the service again later., The remote server returned an error: (503) Server Unavailable.
2020.06.11 07:18:48.539 *ERROR* 10349 [Client=UX, Page=HybridConnectorInstall, Thread=8] 

The connection to the server 'CUSTOMER-APPID-GUID.resource.mailboxmigration.his.msappproxy.net' could not be completed., The call to 'https://CUSTOMER-APPID-GUID.resource.mailboxmigration.his.msappproxy.net/EWS/mrsproxy.svc' failed. Error details: The HTTP service located at https://CUSTOMER-APPID-GUID.resource.mailboxmigration.his.msappproxy.net/EWS/mrsproxy.svc is unavailable.  This could be because the service is too busy or because no endpoint was found listening at the specified address. Please ensure that the address is correct and try accessing the service again later. --> The remote server returned an error: (503) Server Unavailable.., The HTTP service located at https://CUSTOMER-APPID-GUID.resource.mailboxmigration.his.msappproxy.net/EWS/mrsproxy.svc is unavailable.  This could be because the service is too busy or because no endpoint was found listening at the specified address. Please ensure that the address is correct and try accessing the service again later., The remote server returned an error: (503) Server Unavailable.
2020.06.11 07:18:48.550         10390 [Client=UX, Page=HybridConnectorInstall, Thread=8] Test duration 00:05:20.5283461
2020.06.11 07:19:37.075         10062 [Client=UX, Page=HybridConnectorInstall, Thread=1] [Close/Cancel] Pushed: True
2020.06.11 07:19:37.092         10266 [Client=UX, Page=HybridConnectorInstall, Thread=1] FINISH Time=369.1s

When HCW installs the Hybrid Agent on a server, it also looks at the URL set on the EWS virtual directory and sets this in the Azure AD Application Proxy cloud.

The value set on the EWS virtual directory internally will look something like this:

"https://FQDN/EWS/Exchange.asmx"

HCW will strip off "EWS/Exchange.asmx" and set the value in the cloud as:

"https://FQDN/" for example... https://mail.contoso.com/

This is what Hybrid Agent utilises by default for all communication with on-premises Exchange.

When the Hybrid Agent service starts for the first time, it downloads its configuration from Azure AD Application Proxy cloud through a  JSON Graph call.  This is also shown in the Hybrid Configuration Wizard log and resulted in "Application_NotFound".

2020.06.16 05:03:31.533         10332 [Client=UX, fn=SendAsync, Thread=23] START GET https://graph.microsoft.com/edu/d2a627a8-8704-4164-88d6-1355bb35ee0e/applications/9062c321-7c9b-415e-ab46-a19e92ebdf68/onPremisesPublishing
2020.06.16 05:03:32.604         10333 [Client=UX, fn=SendAsync, Thread=23]
                                      FINISH Time=1070.9ms Results=NotFound {
                                        "error": {
                                          "code": "Application_NotFound",
                                          "message": "Application '9062c321-7c9b-415e-ab46-a19e92ebdf68' not found or OnPremisesPublishing is not enabled for your tenant.",
                                          "innerError": {
                                            "date": "2020-06-16T05:03:32",
                                            "request-id": "a6b5704d-09ef-4def-a473-c1f82ae835b7"
                                          }
                                        }
                                      }

Utilizing the HybridManagement.psm1 PowerShell Module we can also manually check this with the Get-HybridApplication cmdlet.


Note: The HybridManagement module is located under ‘C:\Program Files\Microsoft Hybrid Service\HybridManagement.psm1’ and can be loaded with...

Import-Module Azure
Import-Module ‘C:\Program Files\Microsoft Hybrid Service\HybridManagement.psm1’

We were able to validate requests from "Exchange Online" to "Azure AD Application Proxy" to the "Hybrid Agent" were working correctly.  This is validated using the PerfMon counters.  This is done by performing the following.

1. Open up "perfmon" on the Hybrid Agent Server
2. Add the "Microsoft AAD App Proxy Connector" #requests counter.


3. Connect to Exchange Online via PowerShell
4. Run the Test-MigrationServerAvailability cmdlet to force Exchange Online to validate the migration endpoint (same test the Hybrid Configuration Wizard is attempting to perform).  We can see it fail.


5. The test hits from the Exchange Online were connecting to the Hybrid Agent and we were able to validate this by watching the #requests increment each time the Test-MigrationServerAvailability cmdlet attempted the connection and failed.  The Test-MigrationServerAvailability cmdlet attempted the test 6 times before failing resulting in the #requests incrementing from 128 to 134.


What this validates is the requests from Azure AD Application Proxy are hitting the on-premises Hybrid Agent but failing to get to the MRSProxy endpoint on Exchange.


On the Hybrid Agent server itself we were able to access the Exchange Cluster nodes through the load balancer via https://LoadBalancedFQDN/owa and also access the MRSProxy endpoint in Internet explorer with https://LoadBalancedFQDN/EWS/mrsproxy.svc (it throws a bad request but as expected as Internet Explorer will not know how to interact with the MRSProxy web application).  This validated network communication on TCP443 and TCP80 was working correctly.  We also validated that TCP5985 and TCP5986 were open as per Microsoft documentaiton:

https://docs.microsoft.com/en-us/exchange/hybrid-deployment/hybrid-agent

Issue Cause

After working with the product team we were able to identify the issue.  The customer had a free open-source load balancing solution called HAProxy in front of an Exchange 2016 cluster with multiple nodes.  All requests from Hybrid Agent were hitting the HAProxy as this is is what that the DNS record was pointing to set on the EWS virtual directories which Hybrid Agent discovered (as documented above).


As part of troubleshooting, the product team showed me how to manually overwrite which internal endpoint the Hybrid Agent connects to using the HybridManagement.psm1 PowerShell Module.

To see what the InternalUrl the Hybrid Agent is connecting to, use the Get-HybirdApplication cmdlet.  You will need to put the Application ID "CUSTOMER-APPID-GUID" into a variable along with some Global Administrator credentials in a variable.  This is the thing in front of ".resource.mailboxmigration.his.msappproxy.net".
  • The externalURL points at the URL that Exchange Online hits via Azure AD Application Proxy.
  • The internalURL points to the internal URL of the on-premises Exchange servers.  This was pointing at the HA Proxy load balance.


We updated the HybridApplication to bypass the HA Proxy Load Balancer and hit one of the back-end servers directly.  This was done with the Update-HybridApplication cmdlet.


After manually updating Hybrid Agent to communicate directly with one of the backend servers instead of HA Proxy, we used the Test-MigrationServerAvailability cmdlet from Exchange Online.  

Test-MigrationServerAvailability cmdlet was successful!


Very interesting point however which I do not understand yet... When we we manually hit https://LoadBalancerFQDN/EWS/mrsproxy.svc using Internet Explorer from the Hybrid Agent server, we can see the hit in the IIS Logs... however when Hybrid Agent attempted to reach the same URL from the same server, the request never reached the IIS Logs.

What we have done is isolate the issue to the free open-source load balancing solution HA Proxy...

What is interesting though is all other Exchange Load Balancing traffic is transversing the HA Proxy without issues including:

  • MAPI over HTTPS
  • RPC over HTTPS
  • OWA
  • ActiveSync
  • OAB Distribution
  • Other EWS calls such as Free/Busy and the Availability Service
It is very interesting that the MRSProxy call from Hybrid Agent never reaches the IIS Logs on the backend server when going through HAProxy!

Configuring Centralized Transport with Office 365 Exchange Online

$
0
0
I was called in to assist a customer make changes to their Office 365 mail routing.  The customer had a requirement to implement a Centralized Transport Model to ensure all email routes through on-premises so that a custom Transport Agent could run across all email and stamp the companies email signature.  Before we get into the changes needed to setup Centralized Transport, lets run through what the customer currently had in place.
  • All mail from the Internet was routed to a cloud emailing service known as Forcepoint.
  • Force point delivers all inbound email to the on-premises server.
  • The on-premises server has a send connector to Forcepoint for all outbound Internet email "*".
  • The on-premises has a second send connector to Office 365 for cloud based mailboxes
  • There is a route from Office 365 cloud to Forcepoint for all internal mail recipient domains (no idea why this was done, Office 365 EOP should route directly to on-premises Exchange for any internal emails. Luckily Forcepoint was able to route email back to on-premises.).
  • When Office 365 needed to email any Internet Recipients, it routed directly to the Internet bypassing the Forcepoint cloud.
I drew up in Visio a quick overview of what the mail routing looked like.


Now the customer needed to enable a "Centralized Transport Model" to ensure all email from Office 365 was routed through the on-premises server whether it is destined for an external recipient or not.  This is because the on-premises server has a custom Exchange Transport Agent which was responsible for stamping signatures on all outbound email.

Note: A Centralized Transport Model is a very bad configuration and should be avoided at all costs as it means the cloud cannot send/receive email in the event the on-premises Exchange environment is down.  It should only be used when there is a technical requirement such as this one.

I drew up what the mail routing will look like in a Centralized Transport Model:


It is important to note, you can configure a Centralized Transport Model using the Hybrid Configuration Wizard.  This was not an option for this customer as they were on Exchange 2013 CU13 and wanted to address patching at a later date despite being vulnerable to zero day cve-2020-0688 but that's another story. Hybrid Configuration Wizard is constantly updated by Microsoft and is only supported on the two latest CU updates.  Make sure your Exchange environment is running one of the latest CU updates as Microsoft does not test HCW on old releases of Exchange.

"Hybrid deployments require the latest Cumulative Update (CU) or Update Rollup (RU) that's available for your version of Exchange. If you can't install the latest update, the immediately previous release is also supported."

Source: https://docs.microsoft.com/en-us/exchange/hybrid-deployment-prerequisites

Manually Enabling Centralized Transport

To get this customer into a Centralized Transport Model we must do two things:
  1. Create a new "Inbound from Office 365" Receive Connector and i'll explain why this is required in a minute.
  2. Modify the Outbound connector in Office 365 to route all email "*" to the on-premises Server.

Create a Inbound from Office 365 Receive Connector

By default, all email from Office 365 enters through the Default Frontend Receive connector.  The only change made by the Hybrid Configuration Wizard needed to receive email from Office 365 is by modifying the "TlsCertificateName" attribute on the Default Frontend Receive connector so that SMTP TLS can be established between all emails from Office 365 to the on-premises environment.

In a Centralized Transport Model we can no longer use the Default Frontend Receive Connector.  The Default Frontend Receive Connector can receive email for all "Accepted Domains" domains which have mailboxes on the on-premises server.  The Default Frontend Receive connector by default cannot accept email for external Internet Domain Names then route the email to a remote server on the Internet via a Smart Host or MX records for a good reason - this would make the mail server an open relay!

As a result, if you have a requirement to configure a Centralized Transport Model, you will need to create a new receive connector with a name such as "Inbound from Office 365".

As a side note, if you don't do this any emails trying to route out to the Internet through your on-premises server from Office 365 will bounce with the following error:

“550 5.7.1 Unable to relay”

To create the new "Inbound from Office 365" connector required for a Centralized Transport model we need to do the following things:
  1. Create the Frontend Receive Connector and call it "Inbound from Office 365" on TCP25
  2. Configure the Authentication and Permission Groups
  3. Lock the Receive Connector down to the Office 365 IP ranges.
  4. Configure SMTP TLS on the Receive Connector required for Office 365
  5. Configure the ExtendedRight MS-Exch-SMTP-Accept-Any-Recipient so that the Receive Connector can route email out a Send Connector for internet bound emails it receives from Office 365.
When you create the new Frontend Receive Connector enable TLS required for Office 365 and Anonymous Users as we are accepting emails destined for external recipients on the Internet.


Lock it down to the Exchange Online Protection IP Ranges documented here:

https://docs.microsoft.com/en-us/office365/enterprise/urls-and-ip-address-ranges

40.92.0.0/15, 40.107.0.0/16, 52.100.0.0/14, 52.238.78.88/32, 104.47.0.0/17


To configure the SMTP TLS on the receive connector refer to the following article by Paul Cunningham.  It should look like my screenshot below.


Lastly you need to allow the receive connector to accept and relay email for non authoritative domain names (domains that are not an Accepted Domain in your Exchange environment) by adding the ExtendedRight MS-Exch-SMTP-Accept-Any-Recipient.  A command similar to the one below will achieve this.

Get-ReceiveConnector "Inbound from Office 365" | Add-ADPermission -User 'NT AUTHORITY\Anonymous Logon' -ExtendedRights MS-Exch-SMTP-Accept-Any-Recipient


Cool now we have a receive connector on-premises locked down to the Office 365 ranges that will be able to relay email for internet-bound receipts through the Send Connector marked with "*" for all internet recipients.

Modify the Outbound Connector in Office 365

Next we need to modify the Outbound Connector in Office 365 to route all email through the on-premises server in a "Centralized Transport Model" configuration.  I blocked out information below for privacy reasons and using the Microsoft test domain contoso.com instead of my customers.

Get-OutboundConnector "Outbound to GUID" | Set-OutboundConnector -RecipientDomains "*" -RouteAllMessagesViaOnPremises:$true -SmartHosts mail.contoso.com


This will ensure every email leaving Office 365 will go to the on-premises server "mail.contoso.com.

Mail Loop Issue

Despite the configuration for Centralized Transport being correct, we experienced a Mail Loop when routing emails from the on-premises environment to Office 365.  This is what we experienced.


The bounce back we received from the mail loop was as follows, the NDR shows the email bouncing back and forth between Office 365 and Exchange 2013 until Loop Detection kicks in and blocks the email generating an NDR.

Delivery has failed to these recipients or groups:
Test User
A problem occurred during the delivery of this message. Please try to resend the message later. If the problem continues, contact your email admin.
The following organization rejected your message: Exchange2013.domain.local.


Diagnostic information for administrators:
Generating server: SYBPR01MB4362.ausprd01.prod.outlook.com
Test.User@contoso.com
Exchange2013.domain.local
Remote Server returned '554 5.4.6 '
Original message headers:
Received: from ME2PR01CA0046.ausprd01.prod.outlook.com (2603:10c6:201:14::34)
 by SYBPR01MB4362.ausprd01.prod.outlook.com (2603:10c6:10:56::21) with
 Microsoft SMTP Server (version=TLS1_2,
 cipher=TLS_ECDHE_RSA_WITH_AES_256_GCM_SHA384) id 15.20.3021.27; Sun, 24 May
 2020 10:03:55 +0000
Received: from ME1AUS01FT014.eop-AUS01.prod.protection.outlook.com
 (2603:10c6:201:14:cafe::d5) by ME2PR01CA0046.outlook.office365.com
 (2603:10c6:201:14::34) with Microsoft SMTP Server (version=TLS1_2,
 cipher=TLS_ECDHE_RSA_WITH_AES_256_GCM_SHA384) id 15.20.3021.23 via Frontend
 Transport; Sun, 24 May 2020 10:03:54 +0000
Authentication-Results: spf=softfail (sender IP is 203.54.134.98)
 smtp.mailfrom=avantgardetechnologies.com.au; contoso.mail.onmicrosoft.com;
 dkim=none (message not signed) header.d=none;contoso.mail.onmicrosoft.com;
 dmarc=none action=none
 header.from=avantgardetechnologies.com.au;compauth=none reason=405
Received-SPF: SoftFail (protection.outlook.com: domain of transitioning
 avantgardetechnologies.com.au discourages use of 203.54.134.98 as permitted
 sender)
Received: from Exchange2013.domain.local (203.54.134.98) by
 ME1AUS01FT014.mail.protection.outlook.com (10.152.232.114) with Microsoft
 SMTP Server (version=TLS1_2, cipher=TLS_ECDHE_RSA_WITH_AES_256_CBC_SHA384) id
 15.20.3021.23 via Frontend Transport; Sun, 24 May 2020 10:03:53 +0000
Received: from Exchange2013.domain.local (192.168.0.13) by
 Exchange2013.domain.local (192.168.0.13) with Microsoft SMTP Server (TLS) id
 15.0.1156.6; Sun, 24 May 2020 18:00:02 +0800
Received: from AUS01-SY3-obe.outbound.protection.outlook.com (104.47.117.51)
 by Exchange2013.domain.local (192.168.0.13) with Microsoft SMTP Server (TLS) id
 15.0.1156.6 via Frontend Transport; Sun, 24 May 2020 18:00:02 +0800
Received: from SY4P282CA0010.AUSP282.PROD.OUTLOOK.COM (2603:10c6:10:a0::20) by
 SYCPR01MB5248.ausprd01.prod.outlook.com (2603:10c6:10:84::23) with Microsoft
 SMTP Server (version=TLS1_2, cipher=TLS_ECDHE_RSA_WITH_AES_256_GCM_SHA384) id
 15.20.3021.27; Sun, 24 May 2020 09:59:56 +0000
Received: from SY3AUS01FT014.eop-AUS01.prod.protection.outlook.com
 (2603:10c6:10:a0:cafe::23) by SY4P282CA0010.outlook.office365.com
 (2603:10c6:10:a0::20) with Microsoft SMTP Server (version=TLS1_2,
 cipher=TLS_ECDHE_RSA_WITH_AES_256_GCM_SHA384) id 15.20.3021.23 via Frontend
 Transport; Sun, 24 May 2020 09:59:56 +0000
Authentication-Results-Original: spf=softfail (sender IP is 203.54.134.98)
 smtp.mailfrom=avantgardetechnologies.com.au; contoso.mail.onmicrosoft.com;
 dkim=none (message not signed) header.d=none;contoso.mail.onmicrosoft.com;
 dmarc=none action=none
 header.from=avantgardetechnologies.com.au;compauth=none reason=405
Received-SPF: SoftFail (protection.outlook.com: domain of transitioning
 avantgardetechnologies.com.au discourages use of 203.54.134.98 as permitted
 sender)
Received: from Exchange2013.domain.local (203.54.134.98) by
 SY3AUS01FT014.mail.protection.outlook.com (10.152.234.114) with Microsoft
 SMTP Server (version=TLS1_2, cipher=TLS_ECDHE_RSA_WITH_AES_256_CBC_SHA384) id
 15.20.3021.23 via Frontend Transport; Sun, 24 May 2020 09:59:55 +0000
Received: from Exchange2013.domain.local (192.168.0.13) by
 Exchange2013.domain.local (192.168.0.13) with Microsoft SMTP Server (TLS) id
 15.0.1156.6; Sun, 24 May 2020 17:59:22 +0800
Received: from AUS01-SY3-obe.outbound.protection.outlook.com (104.47.117.55)
 by Exchange2013.domain.local (192.168.0.13) with Microsoft SMTP Server (TLS) id
 15.0.1156.6 via Frontend Transport; Sun, 24 May 2020 17:59:22 +0800
Received: from SYBPR01CA0077.ausprd01.prod.outlook.com (2603:10c6:10:3::17) by
 SY3PR01MB1738.ausprd01.prod.outlook.com (2603:10c6:0:1e::9) with Microsoft
 SMTP Server (version=TLS1_2, cipher=TLS_ECDHE_RSA_WITH_AES_256_GCM_SHA384) id
 15.20.3021.27; Sun, 24 May 2020 09:59:16 +0000
Received: from SY3AUS01FT016.eop-AUS01.prod.protection.outlook.com
 (2603:10c6:10:3:cafe::2f) by SYBPR01CA0077.outlook.office365.com
 (2603:10c6:10:3::17) with Microsoft SMTP Server (version=TLS1_2,
 cipher=TLS_ECDHE_RSA_WITH_AES_256_GCM_SHA384) id 15.20.3021.23 via Frontend
 Transport; Sun, 24 May 2020 09:59:15 +0000
Authentication-Results-Original: spf=softfail (sender IP is 203.54.134.98)
 smtp.mailfrom=avantgardetechnologies.com.au; contoso.mail.onmicrosoft.com;
 dkim=none (message not signed) header.d=none;contoso.mail.onmicrosoft.com;
 dmarc=none action=none
 header.from=avantgardetechnologies.com.au;compauth=none reason=405
Received-SPF: SoftFail (protection.outlook.com: domain of transitioning
 avantgardetechnologies.com.au discourages use of 203.54.134.98 as permitted
 sender)
Received: from Exchange2013.domain.local (203.54.134.98) by
 SY3AUS01FT016.mail.protection.outlook.com (10.152.234.71) with Microsoft SMTP
 Server (version=TLS1_2, cipher=TLS_ECDHE_RSA_WITH_AES_256_CBC_SHA384) id
 15.20.3021.23 via Frontend Transport; Sun, 24 May 2020 09:59:14 +0000
Received: from Exchange2013.domain.local (192.168.0.13) by
 Exchange2013.domain.local (192.168.0.13) with Microsoft SMTP Server (TLS) id
 15.0.1156.6; Sun, 24 May 2020 17:59:06 +0800
Received: from cluster-m.mailcontrol.com (116.50.58.190) by
 Exchange2013.domain.local (192.168.0.13) with Microsoft SMTP Server id
 15.0.1156.6 via Frontend Transport; Sun, 24 May 2020 17:59:06 +0800
Received: from mail.avantgardetechnologies.com.au (mail.avantgardetechnologies.com.au [59.167.109.99])
by rly15m.srv.mailcontrol.com (MailControl) with ESMTPS id 04O9x0Xr067289
(version=TLSv1.2 cipher=ECDHE-RSA-AES256-GCM-SHA384 bits=256 verify=OK)
for ; Sun, 24 May 2020 10:59:01 +0100
Received: from Bentley-MAIL.at.local (10.1.30.18) by Bentley-MAIL.at.local
 (10.1.30.18) with Microsoft SMTP Server (version=TLS1_2,
 cipher=TLS_ECDHE_RSA_WITH_AES_256_GCM_SHA384) id 15.2.529.5; Sun, 24 May 2020
 17:58:53 +0800
Received: from Bentley-MAIL.at.local ([fe80::fc2d:dec2:9b22:4f2a]) by
 Bentley-MAIL.at.local ([fe80::fc2d:dec2:9b22:4f2a%3]) with mapi id
 15.02.0529.008; Sun, 24 May 2020 17:58:47 +0800
From: Clint Boessen
To: Test User
Subject: RE: Test External Email through new Receive Connector
Thread-Topic: Test External Email through new Receive Connector
Thread-Index: AQHWMbHMsLmpvI1RokaklktqWBJNSKi3AGdQ
Date: Sun, 24 May 2020 09:58:46 +0000
Message-ID:
References:
In-Reply-To:
Accept-Language: en-AU, en-US
Content-Language: en-US
X-MS-Has-Attach: yes
X-MS-TNEF-Correlator:
x-originating-ip: [10.2.10.104]
Content-Type: multipart/related;
boundary="_006_db8ba13106a042f59f1b4cc7154685ffavantgardetechnologiesc_";
type="multipart/alternative"
MIME-Version: 1.0
X-Modified-HTML: 6
X-Mailcontrol-Inbound: VasuXYiFy3qCtpA1zsc0iLOFFGXQvwm!nVYR6ThwFMIidec+qhp6ZSi!Mnl8Fsmw0sAYU+ZMD9zpwrW47BjDsw==
X-Spam-Score: -2.9
X-MailControl-ReportSpam: https://www.mailcontrol.com/sr/4vHmKlvfRcfGX2PQPOmvUtMaodt6qto8zwizKSQwqRUN24RXJczj00urrTqFWStbC6mdJoQP7nEhR_AbTPK7tQ==
X-Scanned-By: MailControl 44278.2096 (www.mailcontrol.com) on 10.77.0.125
Return-Path: clint.boessen@avantgardetechnologies.com.au
X-EXCLAIMER-MD-CONFIG: 659f567a-0ab7-4104-a8ab-4b8b5d34a680
X-OrganizationHeadersPreserved: Exchange2013.domain.local
X-EOPAttributedMessage: 2
X-EOPTenantAttributedMessage: 7e0e266c-0475-408b-9eb7-cb0cf8b31e59:2
X-CrossPremisesHeadersFiltered: SY3AUS01FT016.eop-AUS01.prod.protection.outlook.com
X-Forefront-Antispam-Report-Untrusted: CIP:203.54.134.98;CTRY:AU;LANG:en;SCL:1;SRV:;IPV:NLI;SFV:NSPM;H:Exchange2013.domain.local;PTR:abi3057722.lnk.telstra.net;CAT:NONE;SFTY:;SFS:(53546011)(2616005)(86362001)(33964004)(19627405001)(26005)(15974865002)(36756003)(356005)(83080400001)(66574014)(166002)(5660300002)(81166007)(24736004)(6916009)(1096003)(336012)(44832011)(108616005)(8676002)(36906005)(19607625011);DIR:INB;SFP:;
X-MS-PublicTrafficType: Email
X-MS-Office365-Filtering-Correlation-Id: 8134a206-5e1e-4c8c-50b8-08d7ffc9c425
X-MS-TrafficTypeDiagnostic: SY3PR01MB1738:|SYCPR01MB5248:|SYBPR01MB4362:
X-MS-Oob-TLC-OOBClassifiers: OLM:6790;OLM:6790;OLM:6790;
X-Microsoft-Antispam-Untrusted: BCL:0;
X-Microsoft-Antispam-Message-Info-Original: =?us-ascii?Q?iA2wyOTRoRwZLE3dlGXOPjuc/V5nlVGk0qx3c3cVWVq6DeIGm1BllHTCVSiP?=
 =?us-ascii?Q?WdgykixTEOiu5qMNLlDbyvS2B3E3qFunMZOmsip1wW+2+EYpZWRl3h3p1qMe?=
 =?us-ascii?Q?gyHb+gYsWcLLLO/d2oyvKNCusbLDzM+doRdC675aXRpQLJVN0nkIvoeTlN8q?=
 =?us-ascii?Q?uAxB3OZWclI1iz0LWyGk7q7bEL0cf1B7+L5gEvxv+6ccBVjGxDCUARbDvLnH?=
 =?us-ascii?Q?l0az2fYOYGteZOTgZkL/QA4P+UdTnL/ZJFD524SawSpoIipAp4/jd7q4HCdF?=
 =?us-ascii?Q?ii+IYIBvHSb+Ib07PQyBHWQZWcetnQvin6wKe4zFmVxal3O331OUhADCrNX2?=
 =?us-ascii?Q?dABvHfIW5pde9NNG+gtPKa4839nANzsibjIrC4S5/myohU3D0tfQNc21sV9c?=
 =?us-ascii?Q?X8ajwUqsg8oiwXaJEXeZqyS9+em0DhmjpML3/H8aLUa9krvS1hjk/T/95gaU?=
 =?us-ascii?Q?9JlTkvW7otLXXP3scvj9VPvP45JDQ0T4/UV+tS8NciviPlgMPcPHSck6tAE1?=
 =?us-ascii?Q?Bbvs5/mIP8ExRjpHLOrAP1bnFdotp7LAeP9zDvnQ4noFncY7VDCGA7aRAYvp?=
 =?us-ascii?Q?gzi5CYKQc6W7E7vMJaQ4poq567KhRJOgBiLy7/P6LwTaGAQDkCJtydjtCdMX?=
 =?us-ascii?Q?D3gaOUKUGptP07VQXA5kSOqYbXIIzkLuMAzUMpdJ9sUMCuYqZntL7oEJs5Vz?=
 =?us-ascii?Q?7ya/OmOTaSGyWqXURw6jyt7s3sPxXRwZYrszcZx/fTi7CpgMzhgNsVvlyplQ?=
 =?us-ascii?Q?DxgEO7zetqixpz+MfGCpO4oqxlnEaBAcLf7ml8A/UsavMy3MCnghUtFKfZzy?=
 =?us-ascii?Q?C2fXr0H5Q7dm0GS2UA4UwIwGx27nU2ah2542blE+41kzfT2yj0Pya36mePgi?=
 =?us-ascii?Q?Eie4ZoX7lxJ5Ob1l5b6g4Fn6cd2iOVwZw8ldz7TVZEus/r9HbKD96H7E+0gO?=
 =?us-ascii?Q?Jzr37suMHpaKJdTwrQUvXPff7rt3NhglfVoFFc0YaEiJqUKK8YvoyDDqriBg?=
 =?us-ascii?Q?7mSl3nudaNDXcsrZwMH39Ee8glstaFgu3Iht1G5bXjIjzAnu4d8DAONd/Vuw?=
 =?us-ascii?Q?lmIf3jkbeczjusoRukL7qLwFHx766qhLVbNT5ublsgPn8Ed2qUeJcPawb8gf?=
 =?us-ascii?Q?SYCLxnFICDvNWpMogjNuqJr1Vl6dJWtQRruNF0kUNm4rlJnuVXtQ0+B4eeyL?=
 =?us-ascii?Q?Hi2Xi4zvRHnA4EezF7lkDe4XE4/XN74zr1l2KXbTC2qFyAX1UUuKWST9INZU?=
 =?us-ascii?Q?bzlyIW+f4GylBSwuFknr?=
X-MS-Exchange-Transport-CrossTenantHeadersStamped: SY3PR01MB1738
X-OrganizationHeadersPreserved: SY3PR01MB1738.ausprd01.prod.outlook.com
X-CrossPremisesHeadersFiltered: Exchange2013.domain.local
X-OrganizationHeadersPreserved: Exchange2013.domain.local
X-CrossPremisesHeadersFiltered: SY3AUS01FT014.eop-AUS01.prod.protection.outlook.com
X-MS-Exchange-Transport-CrossTenantHeadersStripped: SY3AUS01FT014.eop-AUS01.prod.protection.outlook.com
X-Forefront-Antispam-Report-Untrusted: CIP:203.54.134.98;CTRY:AU;LANG:en;SCL:1;SRV:;IPV:NLI;SFV:NSPM;H:Exchange2013.domain.local;PTR:abi3057722.lnk.telstra.net;CAT:NONE;SFTY:;SFS:(36756003)(336012)(2616005)(44832011)(6916009)(15974865002)(8676002)(1096003)(36906005)(2160300002)(108616005)(86362001)(5660300002)(53546011)(166002)(26005)(33964004)(24736004)(81166007)(356005)(83080400001)(19627405001)(66574014)(19607625011);DIR:INB;SFP:;
X-MS-Office365-Filtering-Correlation-Id-Prvs: 88288457-f197-4473-a57d-08d7ffc91d97
X-Microsoft-Antispam-Untrusted: BCL:0;
X-Microsoft-Antispam-Message-Info-Original: =?us-ascii?Q?HDO3W+nr056uwZuOZ7TYTG2KW9HPxRSExlC/7yQL77Lh8xd5toPU9ZMXlt+/?=
 =?us-ascii?Q?q8S3K0REYizRMHkthA3wNJb6MU4vgHvsPbRJNHjBeJw08xJepEx7YRJklYdx?=
 =?us-ascii?Q?nSegk5JXfkz3FnYHpVhO1t7qoKwwcMFHifB69QFoA0V6ggrIjDJEwNq27sTb?=
 =?us-ascii?Q?u2vrAss33OY+1dUUp1GiiBZzT4DpL16QotqSIEfiRFWWXS/KqbwJEJ0+wp7l?=
 =?us-ascii?Q?ujFm3W1ndL5XWmRlztxS3+/E4mHNVqAj0hgoUu97adO/E0+oqbYn61mqNOH0?=
 =?us-ascii?Q?FkDij6ZoUw3XFYNu0hTpsUoGBEWCu9aX1/cz2TVmAGN5DBXfYI9+ZgLeXOF2?=
 =?us-ascii?Q?7/5m+E9c6zQLpPRWNj+0q821bxNzE4yhUB+C+K5PNqCpg3YAd2kws7e2+HjT?=
 =?us-ascii?Q?ybEvvGfrX/JVlhTA+5yK0YQwNm0caLgx/BTKx0dEFUoHGaDqg0LRQlnEXr9y?=
 =?us-ascii?Q?zPftt3dapzVbKQdVp15Ae1ErOleQLDRZEpQ/m50pQji37iHH/jpf84LthOQB?=
 =?us-ascii?Q?NX/oUDEZsyj83RowWP6sSAZ7Z9NFSoFKkubvDqMeXflQbW3vz+oL/cJfuSoZ?=
 =?us-ascii?Q?eC12mwEvYibjhWqUsYB5NnSQ1DmvW/WGZNioxbinDOlxrclSm/g7RwKdkkl1?=
 =?us-ascii?Q?NADfKmk3dN5roljcmd/MrBszuC4nigH7USGCCVMDTPSmoP9I+TAPhhKaRP26?=
 =?us-ascii?Q?LNQh5Fe50kxOxwdUGSDoQTr56sUkaGEIsoiP/ue4PMRRXZMjPGTbCI6eCRde?=
 =?us-ascii?Q?hdfTd9fMIeSBjKhNXDtc5P63e9fhp8SXVeT5T4MycPOs+VKEgL9K8cassjbr?=
 =?us-ascii?Q?KmbSdhp00ftDoi9Q8of6jV/Ve6CSYgFIqi9MYd5EUwGOYTK6hcAiU4B1oe5G?=
 =?us-ascii?Q?sVMksEY0SMKTcHn3gnQVuWRXKpjDMU5nYVh2SklhVa1sgo2SR+9i2dDw8Wsd?=
 =?us-ascii?Q?TVt3bMWhm33WMVi79TZla9z3DOqzS9HRZ8lpJKzHS/iO3KMDPq1GwryMRu63?=
 =?us-ascii?Q?PVjn+KYYvEs+l1c5/Qbgb64uwjoL+VZ76x4E4YvR6WaSScFLtuqs6pwAzoYB?=
 =?us-ascii?Q?hFRxmXcdjdnPGh3klPWyqBARJOlKMTR3tzcA7g6MFm7wp4lmKh7PwwPLJIkA?=
 =?us-ascii?Q?QVIN591rFcQ8RQIj47kf5BaJRj3GoosyZsnilb8L2wIwRiQjSsmUmk+cqQ3G?=
 =?us-ascii?Q?M3UtTLIA53MQk6UL1Z1Sd9iXZDdZwY8p9r7vi5lPWmtjQ9Aeo/AomnwY71N3?=
 =?us-ascii?Q?eZ6E2tP8thFY//uSKB7l?=
X-MS-Exchange-Transport-CrossTenantHeadersStamped: SYCPR01MB5248
X-OrganizationHeadersPreserved: SYCPR01MB5248.ausprd01.prod.outlook.com
X-CrossPremisesHeadersFiltered: Exchange2013.domain.local
X-OrganizationHeadersPreserved: Exchange2013.domain.local
X-CrossPremisesHeadersFiltered: ME1AUS01FT014.eop-AUS01.prod.protection.outlook.com
X-MS-Exchange-Transport-CrossTenantHeadersStripped: ME1AUS01FT014.eop-AUS01.prod.protection.outlook.com
X-Forefront-Antispam-Report: CIP:203.54.134.98;CTRY:AU;LANG:en;SCL:1;SRV:;IPV:NLI;SFV:NSPM;H:Exchange2013.domain.local;PTR:abi3057722.lnk.telstra.net;CAT:NONE;SFTY:;SFS:(24736004)(36756003)(36906005)(19627405001)(26005)(53546011)(5660300002)(33964004)(108616005)(44832011)(6916009)(15974865002)(2616005)(86362001)(1096003)(166002)(336012)(356005)(66574014)(83080400001)(8676002)(81166007)(19607625011);DIR:INB;SFP:;
X-MS-Office365-Filtering-Correlation-Id-Prvs: 2bb48326-def0-492c-8752-08d7ffc935e8
X-Microsoft-Antispam: BCL:0;
X-Microsoft-Antispam-Message-Info: =?us-ascii?Q?vyA9jQ5YP4tbiJQ1N2ff25VgnM+SJiFhE3Yln6tQVaileyKRkO+BuzPHYj6Q?=
 =?us-ascii?Q?R+XgxcBUeNcGuLQOtJZJD6XEXu0UbScHjmvFzBtKM6xT7AC9PD1aTcQ364rJ?=
 =?us-ascii?Q?c8SxdVfBKMuOWjAKK/SHGyuZdAvObLEbgloQS/lG3UEJkCUTEHm8n2WqXggb?=
 =?us-ascii?Q?IZiBNwqd4iWWStR+UyIM/h3t/TIToNx5FHbPD4fPAvZG/L+lCasiGPkaw7sf?=
 =?us-ascii?Q?ZQJfKrllu9oRIjrxw4NYTtDfQdr2OJ+IA606UhprZ7tmrlBIoid+NsFDXB62?=
 =?us-ascii?Q?G/9VH6IvGRNxA445F6764dIyXifRsuaGYs/T11WSIzAJ/5ArCemQuAf+1Ek6?=
 =?us-ascii?Q?KyhsNPSmh9+rGGmNuvV5RXh2E4aqDhZWS6ZGK1aMSTXO6KHeQd+FrEZHM3nf?=
 =?us-ascii?Q?Xl5OdF6OPKdLlMv1nEa1UVpMi52rkMvxXp7DRmWxspsi9JkIhlU/OBdMjOmC?=
 =?us-ascii?Q?Us+aJLNXT9O/JIc/7mPwNE3e8+Hj9zIHxNIcrYelEoopTGXSmcdTP0eOslts?=
 =?us-ascii?Q?Ap1JQ0sEeODnnNs4Z0r2NjzrHOOKRY8YjLhXz4vE+iWzzMhLUgW+17Lc9cHG?=
 =?us-ascii?Q?/z9uQm800gOM7k6By+jhkxzM8Ho49Uin65W3YMI31VqWQzTgg6kBxoYgNqls?=
 =?us-ascii?Q?VylLdyHSa8rjX3n31TNqzFxN7DHZRLL+0Ar/53pw9yj6YETYgoBZX8b4zQCD?=
 =?us-ascii?Q?KZl6GY+7WSjn1MlecYlPAlCCY3rSkwPWGaP5nb1OMPryBPa/hCna5UQJpQK0?=
 =?us-ascii?Q?NKCSLmg374I4/+jrylQ/fR1upcDBJwDfX0c28v3kzCxv1wlGwWK4LSn5SWrM?=
 =?us-ascii?Q?GZOW6Cc3K+/G/prlpPrCPsRHdNNGVaGWHqoaaFrLgnFeJQiKDu+afKXAaSem?=
 =?us-ascii?Q?yqCF551HYU+ItucZDwzF2L2yAu0hX3PZohye+tT4ErFrGAtYrZdAWHr23wL4?=
 =?us-ascii?Q?+LH54epp83Xrgl0aZm4N1XomI0G94LY+vBQiNK3W075GoK2bhNvYYmVGR03q?=
 =?us-ascii?Q?w0uD8TzzRXd7MSOC6nwwKCJDiovNYq3ms4AsY4B/t4UQyf/mhTr9h24yuBCa?=
 =?us-ascii?Q?1GUkuH/ta2m/4NfpUefV0dlBJtCS1QWEZsCClWHo0UPUb+PwtPNO7atyR4vj?=
 =?us-ascii?Q?hmIkERJe2CYWSVa3B8mKM+Md70ZSPNIdSCHM+FXhM28DAntZmBt3Ox8zVl5Y?=
 =?us-ascii?Q?2yDsCXoYhGM9UByN5JXDkMe3WwH14Mm++895YPqAMT9u5Zd8OeWAw7WztPC3?=
 =?us-ascii?Q?RDfJkidLJlLE5XVEABX7?=
X-OriginatorOrg: contoso.onmicrosoft.com
X-MS-Exchange-CrossTenant-OriginalArrivalTime: 24 May 2020 10:03:53.9414
 (UTC)
X-MS-Exchange-CrossTenant-Network-Message-Id: 8134a206-5e1e-4c8c-50b8-08d7ffc9c425
X-MS-Exchange-CrossTenant-Id: 7e0e266c-0475-408b-9eb7-cb0cf8b31e59
X-MS-Exchange-CrossTenant-FromEntityHeader: Internet
X-MS-Exchange-Transport-CrossTenantHeadersStamped: SYBPR01MB4362
X-OrganizationHeadersPreserved: SYBPR01MB4362.ausprd01.prod.outlook.com
X-CrossPremisesHeadersFilteredByDsnGenerator: SYBPR01MB4362.ausprd01.prod.outlook.com

Reverting the change we needed to troubleshoot.  With Centralized Transport disabled on the Outbound connector we saw that any emails passing from on-premises to Office 365 had in the header:

X-MS-Exchange-Organization-AuthAs: Anonymous

Office 365 should be receiving any emails from the on-premises Exchange Server as "Internal" if they are in the same tenant.  This means the emails were not hitting an Inbound Connector in Office 365 and were coming into Office 365 as anonymous.  This can also cause the SMTP error "451 4.7.500 Server busy" for very large tenants as Microsoft throttles emails from anonymous sources to limit spam in Office 365 - for more information see .

After researching the issue and a call with Microsoft, we saw that there was a problem with the Certificate configuration on the Inbound connector.  The common name on the certificate - lets say "mail.contoso.com" was correct on both ends however the Organisation Name on the certificate was different which was enough to cause inbound SMTP email from on-premises to be not identified by the Inbound Connector and get flagged as anonymous.


To fix this issue, we needed to modify the Inbound Connector from having multiple attributes of the certificate as shown below.


To only having the "Common Name" of the on-premises certificate which for argument sake lets call it "mail.contoso.com".


After fixing the certificate details on the Inbound Connector, emails from on-premises to the cloud were identified as Internal.  This can be verified by looking in the message header in one of the emails.

Note: You need to wait an hour for any changes to Exchange Online to propagate to Exchange Online Protection unless you speak to Microsoft Support, they have a script that forces it on the backend!

830fecf9-8ece-4d66-2536-08d81e5f643a
X-EOPAttributedMessage: 0
X-MS-Exchange-Organization-MessageDirectionality: Originating
X-MS-Exchange-Organization-AuthAs: Internal
X-MS-Exchange-Organization-AuthMechanism: 04
X-MS-Exchange-Organization-AuthSource: Exchange2013.domain.local
X-MS-Exchange-Organization-SCL: -1
X-CrossPremisesHeadersPromoted:
SY3AUS01FT006.eop-AUS01.prod.protection.outlook.com
X-CrossPremisesHeadersFiltered:
SY3AUS01FT006.eop-AUS01.prod.protection.outlook.com

After this, we re-instated the Centralized Mail Configuration and it worked perfectly.

SMTP Namespace Sharing - How it differs in the Cloud

$
0
0
When you enter Hybrid with Microsoft Office 365, you establish a concept called SMTP Namespace sharing to allow mailboxes in the cloud and on-premises to share the same address space such as @contoso.com.

Microsoft Exchange handles SMTP Namespace Sharing with Office 365 in a different manner to implementing SMTP Namespace Sharing with another Exchange Server or third party mail system.

In this blog post we are going to run through how to configure SMTP Namespace Sharing between an Exchange Server and another mail system, and then look at how SMTP Namespace Sharing works with Office 365.

Configuring SMTP Namespace Sharing

Before we talk about SMTP Namespace Sharing, we must first understand the concept of an Exchange Accepted Domain.  There are three types of Accepted Domains:
  • Authoritative Domains - This tells an Exchange Server that the "Exchange Organisation" has a recipient (in particular a mailbox) for that inbound email such as recipient@contoso.com and it needs to deliver it locally.  All email address namespaces that your Exchange Servers receive email for need to be setup as Authoritative Accepted Domains.
  • Internal Relay Domains - Internal Relay Domains are used when you share a domain between the Exchange organization and a third-party messaging system.  When an Exchange Server receives an email for an email address such as user@contoso.com, it will look to see if a mailbox exists, else send it out a Send Connector.
  • External Relay Domains - No mailboxes exist on the Exchange Environment, send it out a send connector matching the address space.  You would use these if your Exchange Server is setup to perform mail cleansing at a transport layer most likely with a third party Transport Agent, then send the email on its way.

To configure SMTP Namespace Sharing, you would change the Accepted Domain to an "Internal Relay Domain" and then create a send connector.  An example config would look like this:

Set-AcceptedDomain contoso.com -DomainType InternalRelay

New-SendConnector -Name "SMTP Namespace Sharing for Consoto.com" -Custom -AddressSpaces contoso.com -SmartHosts 10.1.1.54 -SourceTransportServers ExchangeServerFQDN

This will tell all Transport Servers in the Exchange Organisation to perform the following:
  1. Look in Active Directory to see if a mailbox exists, if it does route the email to the Mailbox Server and deliver it.
  2. If a mailbox doesn't exist, route it out a Send Connector to a remote mail environment for delivery instead of sending the typical 550 5.1.10 RESOLVER.ADR.RecipientNotFound error.

Configuring SMTP Namespace Sharing with Office 365

When you enable Hybrid Exchange using the Hybrid Configuration Wizard (HCW), SMTP Namespace sharing is setup differently.  After you move a mailbox to Exchange Online, it replaces the mailbox on-premises with a "Remote Mailbox" object.  These mailboxes can be viewed in the Exchange Admin Center as "Office 365" Mailboxes or with the following on-premises Exchange cmdlets:
  • Get-RemoteMailbox
  • Set-RemoteMailbox


Each of these Remote Mailboxes have a "Remote Routing Address" which looks like alias@tenant.mail.onmicrosoft.com.  If we look at one of the Remote Mailboxes in Exchange Admin Centre on-premises, we can see there is a new box to specify the Remote Routing Address.

Note: This can also be set using Set-RemoteMailbox "mailbox name" -RemoteRoutingAddress "avantgarde@tenant.mail.onmicrosoft.com"


In addition, SMTP Namespace Sharing does not require the Accepted Domain be changed to an "Internal Relay Domain".  It should stay "Authoritative" due to these Remote Mailbox objects.

How the Remote Routing Address is Set

By default, when you run Hybrid Configuration Wizard and move a mailbox to Office 365, the Remote Routing Address is set automatically and you never need to touch/look at this value.

We had an incident however for a customer where the Remote Routing Address was getting automatically set to the users primary domain name, not the Office 365 tenant.mail.onmicrosoft.com SMTP namespace.

How Exchange Server sets the Remote Routing Address automatically is unclear.  I can confirm it does not get set by an Email Address Policy.

We have reached out to Microsoft to find an answer, as it is important this is set to the correct value automatically!

Exchange Not Functional after installing Patches

$
0
0
We had an Exchange 2016 server running Exchange 2016 Cumulative Update 15 where as part of Windows Updates it rendered the server not functional.  The update that we installed was the Security Update for Exchange 2016 - KB4536987.

After the update, the following symptoms were experienced.

All Outlook clients received the following message when attempting to open Outlook.

Cannot start Microsoft Outlook. Cannot open the Outlook window. The set of folders cannot be opened. The attempt to log on to Microsoft Exchange has failed.


Users could log onto Outlook Web App (OWA) however could not send email.  All messages sent would go straight to Draft folder with the message:

Something went wrong and we haven't been able to send your message yet.


The Exchange Remote Connectivity Analyzer tool passed all tests under "Outlook Connectivity".

Attempting to connect to the SMTP service on localhost results in the SMTP Error Code "421 4.3.2 Service not active".


This lead me to a previous blog post:


The Server Component States were inactive on all Exchange Services after the patch.


In my previous blog post, I used the following command to activate the component states.

Set-ServerComponentState -State Active -Requester Maintenance -Identity SERVER -Component ServerWideOffline


This however did not work... All components remained in the state Inactive.

To change the component states to Active, I needed to change the requester to Functional.


Boom we were back online!


432 4.3.2 STOREDRV.Deliver recipient thread limit exceeded

$
0
0
I had an issue with an environment with a mixture of Exchange 2010 and Exchange 2016 servers.  All mail to one of the Exchange 2010 servers was getting stuck in queue and not delivered.


This is a very weird error and I have not come across it in my many years working with Microsoft Exchange.

To fix this issue, the following two lines need to be added to the ExchangeTransport.exe.config file in the Exchange bin directory.


Then restart the Exchange Transport service.  Mail flow should begin working again.  For more information about this error please refer to the following Microsoft blog post:

https://blogs.technet.microsoft.com/exchange/2011/04/11/store-driver-fault-isolation-improvements-in-exchange-2010-sp1/

Third Party Transport Agents delaying Emails and Crashing the Transport Databases

$
0
0
I had a customer experiencing extensive delays receiving email through the Exchange Transport stack both for internal and external mail relay.

When we ran the Get-Queue or Get-Message cmdlets, the following error was experienced.

Exchange can't connect to the Exchange Transport service on computer "localhost". Verify that the service is started.


Interestingly, sometimes when we ran the Get-Queue and Get-Message command, the correct output was returned so this issue was intermittent.

During the issue, I noticed that the ExchangeTransport.exe service enters a suspended state.


Looking at the Application Logs on the server, I noticed the Transport ESE Databases (the Sender Reputation and IP Filtering) were constantly being rebuilt.

  • edgetransport (34164) Sender Reputation Database: The database engine is initiating recovery steps. 
  • edgetransport (34164) Sender Reputation Database: The database engine has begun replaying logfile C:\Program Files\Microsoft\Exchange Server\V15\TransportRoles\data\SenderReputation\trn.log. 
  • edgetransport (34164) Sender Reputation Database: The database engine has successfully completed recovery steps. 
  • edgetransport (34164) Sender Reputation Database: The database engine started a new instance (2). (Time=0 seconds) 


Enabling verbose logging on the Exchange server for the Transport Stack we saw that the issue was being caused by third party transport agents.

Get-EventLogLevel "MSExchangeTransport" | Set-EventLogLevel -Level Expert


Log Name:      Application
Source:        MSExchangeTransport
Date:          23/04/2018 3:43:10 PM
Event ID:      10003
Task Category: PoisonMessage
Level:         Error
Keywords:      Classic
User:          N/A
Computer:      COMPUTERNAME
Description:
The transport process failed during message processing with the following call stack: System.Runtime.InteropServices.COMException (0x800706BE): Creating an instance of the COM component with CLSID {9DE1008F-1451-4E2E-8767-A1DAF9BE3560} from the IClassFactory failed due to the following error: 800706be The remote procedure call failed. (Exception from HRESULT: 0x800706BE).
   at ContentSecurity.ExchangeAgents.MailRouteItemSourceContext.processItem(String sender, ArrayList recipients, IStream pRawData, UInt32& pFlags)
   at ContentSecurity.ExchangeAgents.GfiAsRtSubmittedAgent.ProcessMailRouteMessage(SubmittedMessageEventSource source, QueuedMessageEventArgs e, Boolean& bDeleteFromSource)
   at ContentSecurity.ExchangeAgents.GfiAsRtSubmittedAgent.SubmittedMessage(SubmittedMessageEventSource source, QueuedMessageEventArgs e)
   at Microsoft.Exchange.Data.Transport.Routing.RoutingAgent.Invoke(String eventTopic, Object source, Object e)
   at Microsoft.Exchange.Data.Transport.Internal.MExRuntime.Dispatcher.Invoke(MExSession session)
   at Microsoft.Exchange.Data.Transport.Internal.MExRuntime.MExSession.AsyncInvoke(Object state)
   at System.Threading.ExecutionContext.RunInternal(ExecutionContext executionContext, ContextCallback callback, Object state, Boolean preserveSyncCtx)
   at System.Threading.ExecutionContext.Run(ExecutionContext executionContext, ContextCallback callback, Object state, Boolean preserveSyncCtx)
   at System.Threading.QueueUserWorkItemCallback.System.Threading.IThreadPoolWorkItem.ExecuteWorkItem()
   at System.Threading.ThreadPoolWorkQueue.Dispatch()

Disabling the Exchange Transport Agents for GFI and restarting the MSExchangeTransport service resolved the issue.


If anyone experiences these symptoms, please make sure you check your third party Transport Agents!
Viewing all 343 articles
Browse latest View live